Welcome to Moda Fabrics!
Summer in the Country: Grandstand
Summer in the Country: Grandstand
YIELD
56" x 70" quilt
INGREDIENTS
BLOCKS: (16) 12½” unfinished blocks
BACKGROUND: 2 yards white
ACCENT + BINDING: 1 yard blue, ¾ yard red
BACKING: 3½ yards
INSTRUCTIONS
From BACKGROUND, cut:
(2) 8” x WOF strips; subcut into (8) 8” squares
(3) 5½” x WOF strips; subcut into (16) 5½” squares
(4) 2½” x WOF strips; trim each to 40½” long
(4) 2½” x WOF strips; from each strip cut (1) 24½” and (1) 12½” strips for a total of 4 of each size
(2) 2½” x WOF strips; subcut (6) 12½” strips
(1) 2½” x WOF strip; subcut (2) 16½” strips
From BLUE ACCENT FABRIC, cut:
(3) 3½” x WOF strips; subcut (28) 3½” squares
(8) 2½” x WOF strips for binding
From RED ACCENT FABRIC, cut:
(2) 8” x WOF strips; subcut (8) 8” squares
(1) 2½” strip; subcut (4) 2½” squares
From BACKING FABRIC, cut:
(2) 63” x WOF pieces; trim selvedges and sew into a 63” x 80” rectangle
Step 1: Half-Square Triangles (HSTs)
Mark a pencil line on the diagonal of the WRONG SIDE of each of the 8” white squares. Place right sides together with 8” red square. Sew ¼” away from each side of the marked line. Cut apart at pencil line. Press. Trim to 7½” square.
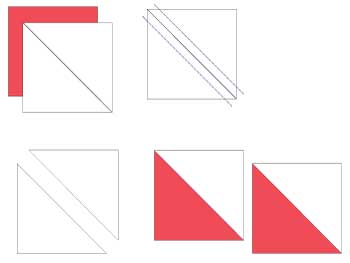
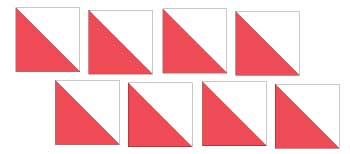
Repeat to make 16 Half-Square Triangles (HSTs).
Step 2: Stitch-n-Flip
Use the 5½” white square to put Stitch-n-Flip corners on the red half of each HST. Use the 3½” blue squares to add blue corners.

Set four units aside, and add 3½” blue Stitch-n-Flip corners to the white half of the remaining twelve units.

NOTE: If you make these border units first, you can use most of the cut-away triangles in some of your sampler blocks.
Step 3: Make Zig Zag Rows
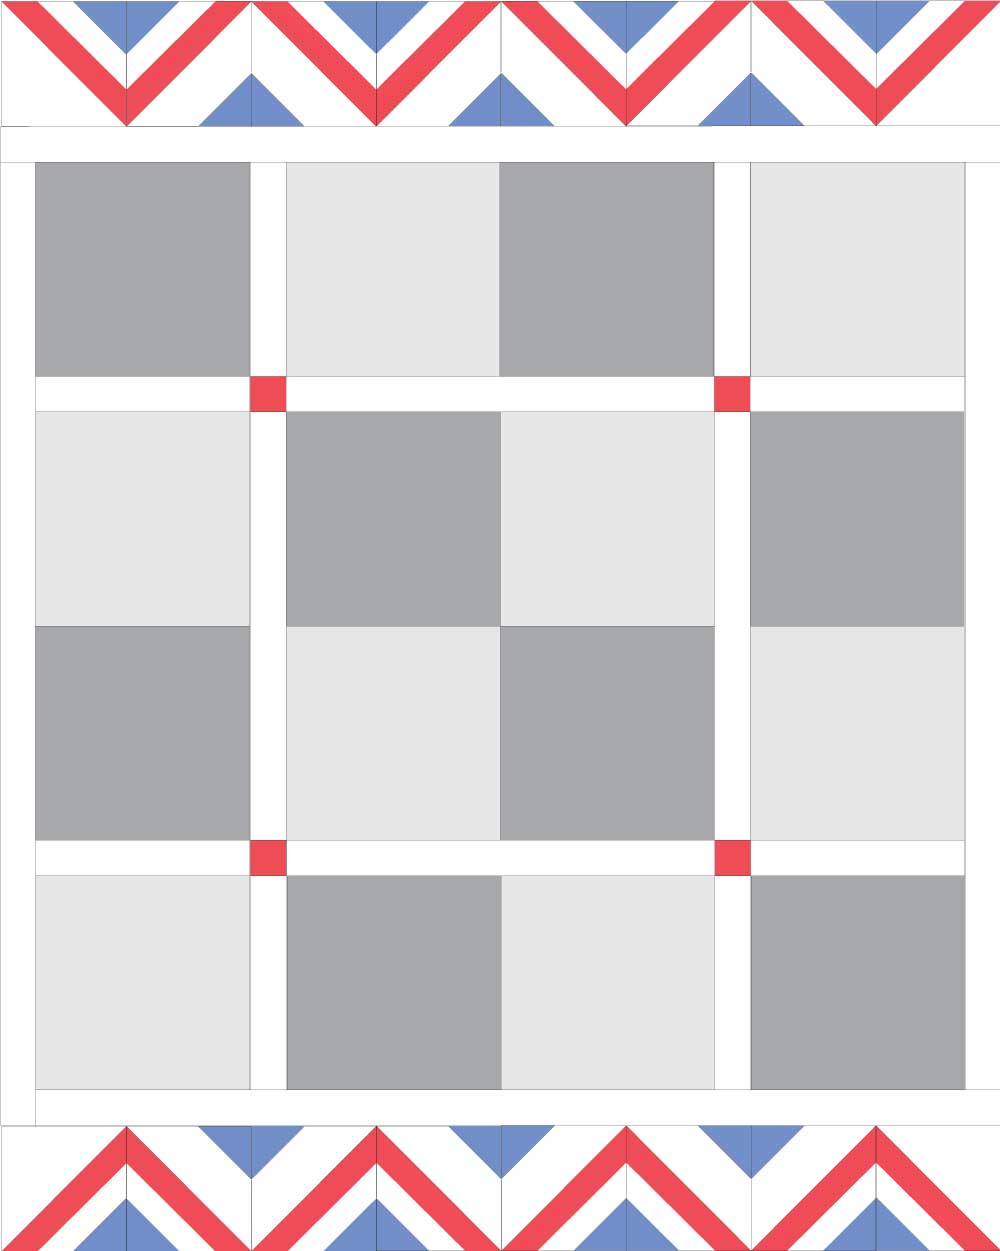
Lay the squares out in two rows of eight squares each. Notice that the squares without the second blue triangle are at the ends of the rows, and the red stripes form a zigzag across the rows.

Step 4: Inner Border
Sew the 2½” x 16½” white strips to the end of (2) 2½” x 40½” white strips. Sew these strips to the bottom of the pieced border strips ( the side that has three blue triangles.)
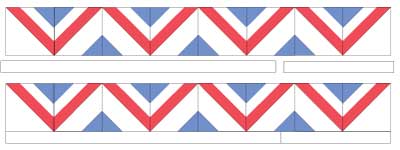
Set these border strips aside.
Step 5: Sashing Strips
Sew two sashing strips, each with two 2½” x 12½” white strips and one 2½” x 24½” white strip, separated by 2½” red squares.

ASSEMBLE THE QUILT
Sew 2.5” x 12.5” white strips to the end of two 2½” x 40½” white strips. These are your side borders.
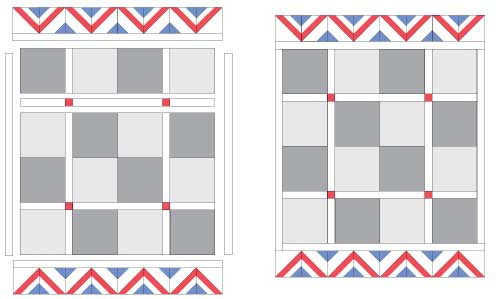
Lay out sixteen blocks in an arrangement that pleases you, and sew into rows as shown.
The top and bottom rows have 2½” x 12½” white strips placed between blocks 1 and 2, and between blocks 3 and 4. Blocks 2 and 3 are sewn together without a white strip between them.
The center row is a “double row” of blocks, with four blocks sewn together in the center, and pairs of blocks on either side. 2½” x 24½” white strips separate the pairs and the group of four blocks.
Sew the block rows together, separated by the white and red sashing strips.
Then sew the 2½” x 52½” white strips to the right and left sides of the block panel.
Finally, sew the border s to the top and bottom of the center piece.
Anne Wiens

Comments