Welcome to Moda Fabrics!
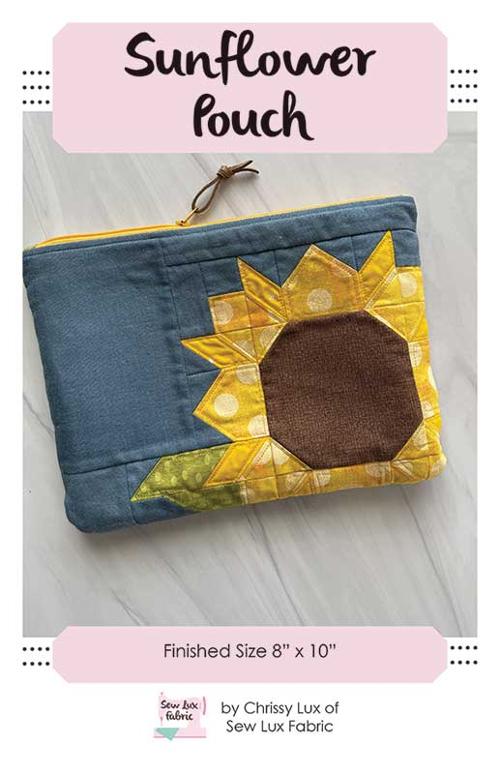
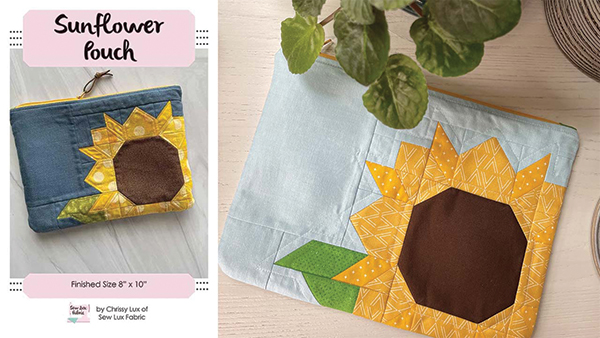
Pouch Club: Sunflower Pouch
Pouch Club: Sunflower Pouch
Published:
Jul 20 2023 - 08:00
Materials Needed:
You will need the following to complete this project:
- 2 Yellow F16s (or Layer Cake squares)
- 1 Green F16
- 1 Brown F16 (or Charm Square)
- 1 FQ Blue Background/Exterior
- 1 FQ Lining
- 1 12" zipper
- 1/3 yard SF-101 Fusible Interfacing
Paper and PDF patterns as well as kits are available in our shop at Sew Lux Fabric or ask your local quilt shop to carry the paper pattern and kit one up for you!
Note: This pattern includes small patchwork, a partial seam and curved bottom corners. Be sure to check out the video linked at the end of this post for additional tips and demonstration of these skills.
Step 1: Piece the Units
Follow the directions in the pattern to cut all your pieces from the fabrics.
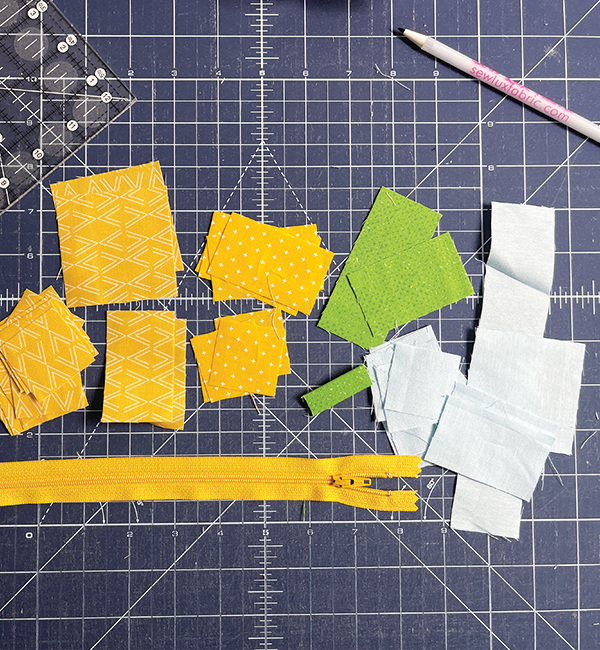
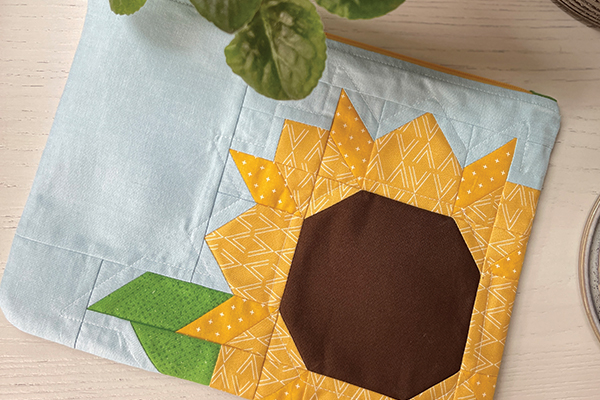
There are several different types of units we will make for this pouch: the sunflower center, large petals, partial petal points, and leaf unit. Be sure to follow the pattern carefully to make all the units required.
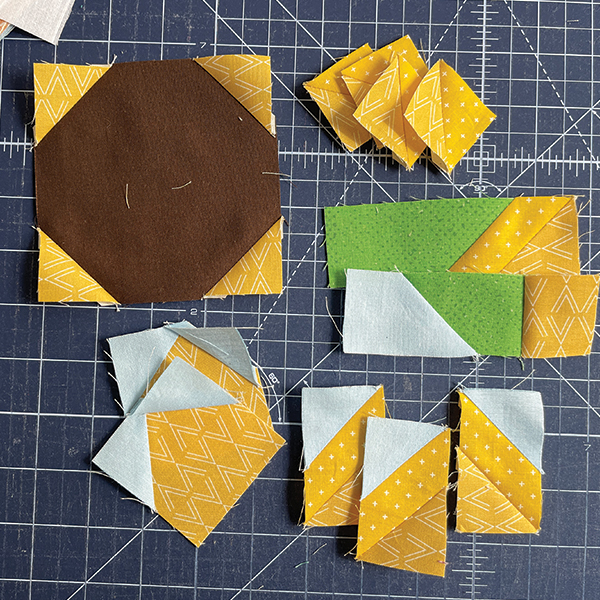
Since we are doing a lot of small patchwork and using a lot of stitch & flip corners, I suggest trimming up units before assembling the pouch front.
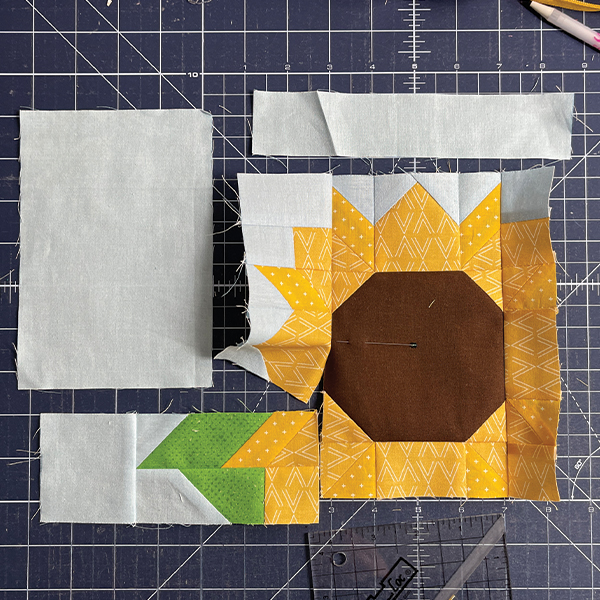
Step 2: Assemble the Pouch Front
It is really important to assemble the units together in the order shown in the pattern directions. This is because a partial seam will be needed. BUT, these don't have to be scary and I will walk you through it here and in the video.
Begin by sewing groups of petal units and blocks into sections as shown in the photo below.
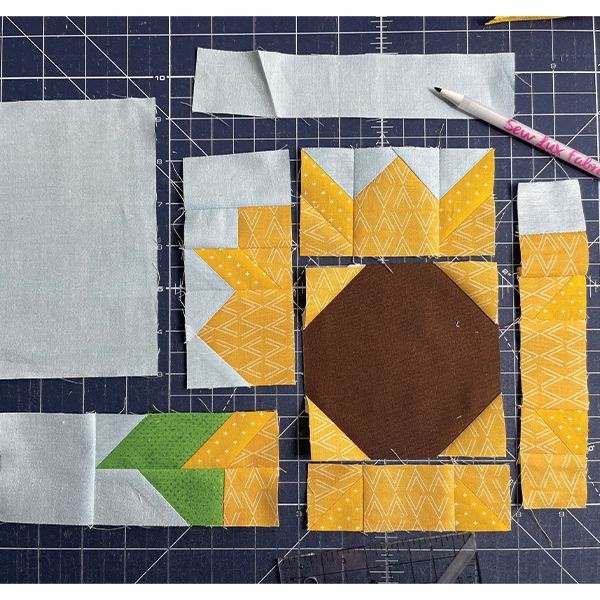
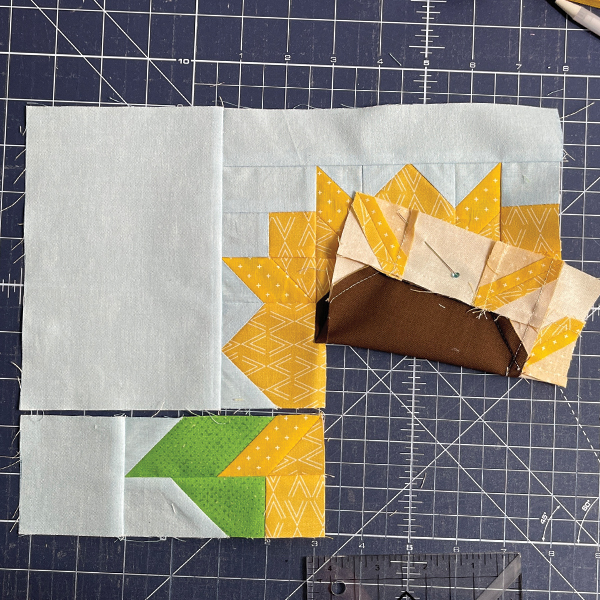
Follow the pattern directions to join the center with the top and bottom of the flower sections together. Then add the right side of the flower.
To create a partial seam on the left side of the flower, you'll make a mark about 1.5" inches from the bottom of that section and sew from the top down to that mark. (I use a pin to mark this spot - refer to the photo below.)
Once the left section and exterior is added, pin center out of the way and add the bottom section of the left side. Then, you'll finish sewing the partial seam to complete the front.
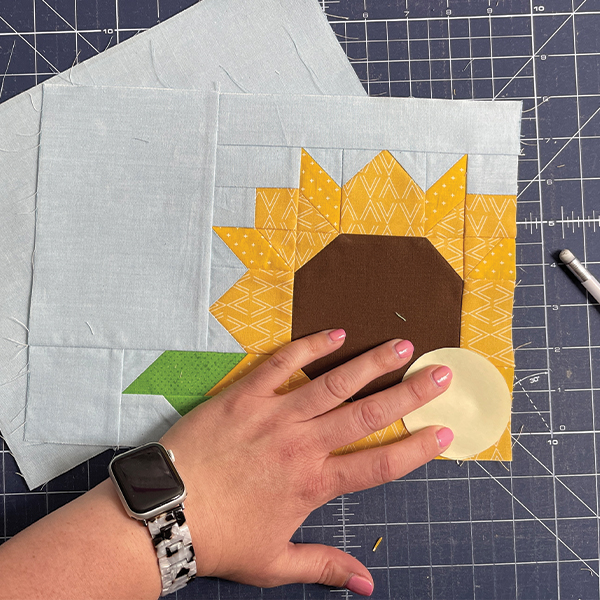
Step 3: Shape the Exterior & Lining
Adhere interfacing to the wrong side of the pouch front and back rectangles.
Add any decorative stitching or "quilting" before moving on.
Use the template in the pattern, or other round object like the bottom of a glass, to draw and trim a curve in the bottom left and right corners of the pouch front, pouch back, and the two lining rectangles.
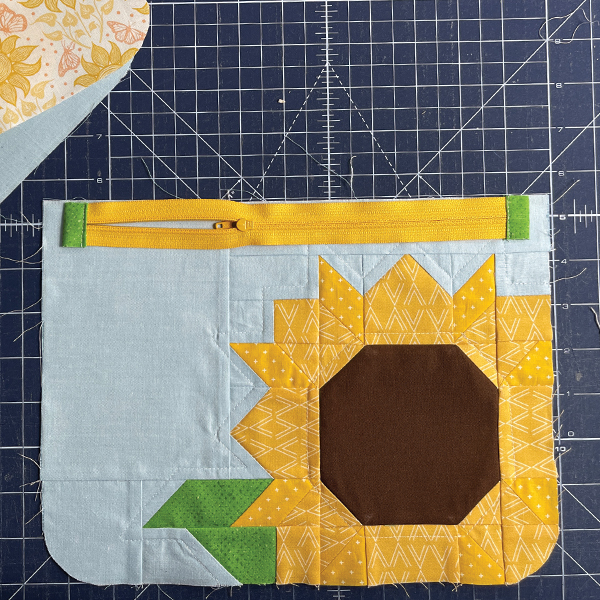
Step 4: Install the Zipper
Follow the steps in the pattern in to make the zipper unit with zipper tabs. (Also discussed in the video linked below.)
Center the zipper on the pouch front with approximately 1/2" on either side to leave room for seams later. Install the zipper.
Step 5: Finish the Pouch
Once you have installed the zipper, be sure the zipper is OPEN and then pin or clip so the exteriors are RST and the linings are RST. Be sure to mark and leave a open section in the bottom of the lining to turn the pouch right sides out.
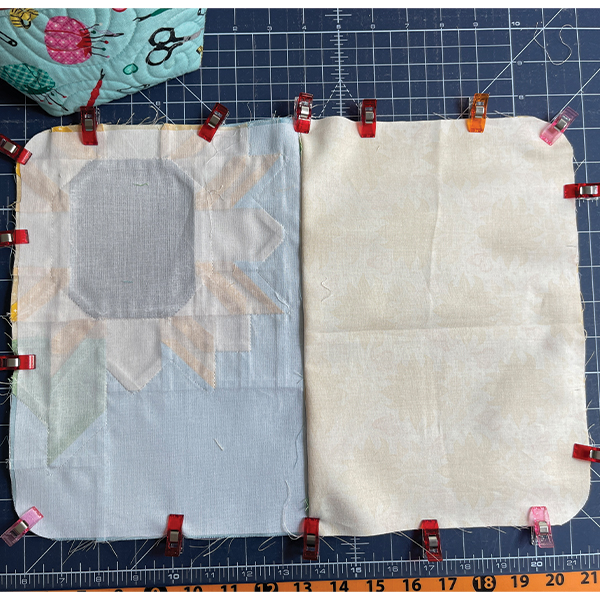
One tip for sewing the curves, is to set your machine so that the needle stays in the down position when you stop sewing. As you go around each curve, take a few stitches, stop and lift your presser foot to rotate the pouch a bit, then sew a few more stitches. Repeat that process through the curve.
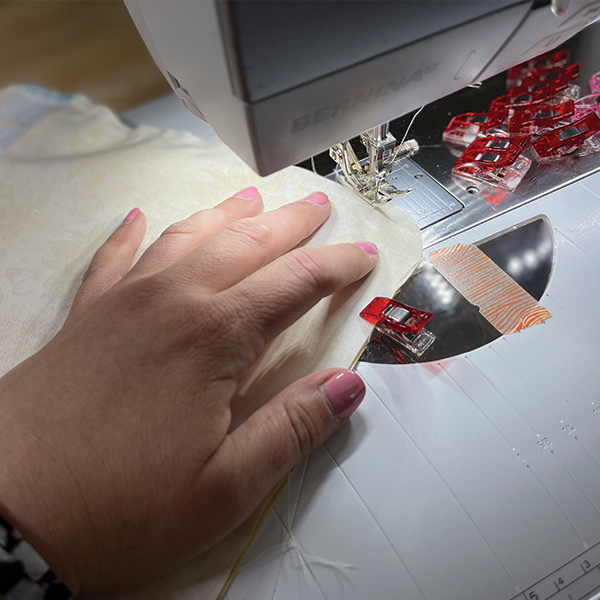
Once you have sewn all the way around, turn the pouch right sides out through the hole in the bottom of the lining, press well and close the opening by hand or machine.
For more details and video of the steps above and some additional tips, check out the video.
Regardless of your favorite style of fabric, this pouch is a winner. It looks great in Grunge and other basics like Spotted and Beyond Bella. We like to use a Crossweave or Chambray for the background, but solids or tonals are also a great choice. We can't wait to see your projects!
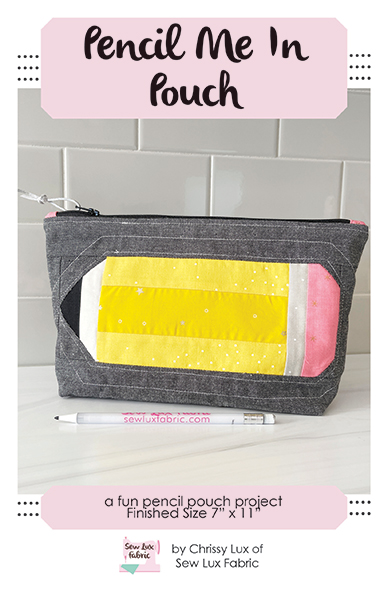
Next month, we will be making the Pencil Me In Pouch - just in time for back to school! See you back here on August 17th for our next installment of the Pouch Club Series.
Posted in:
Comments