Welcome to Moda Fabrics!
Winter Wishes Quilt
Winter Wishes Quilt
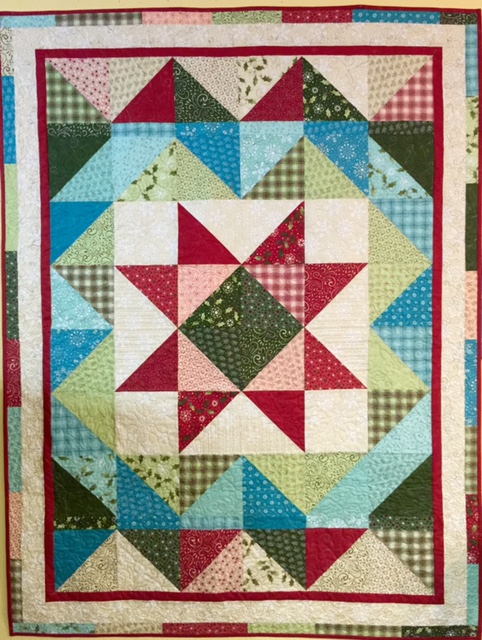
Hi! My name is Deborah Jacobs, co-owner of Gathering Friends Quilt Shop, and I am thrilled to share my first recipe with you. This easy quilt uses one layer cake and 7/8 yard of a dark and 1-1/8 yards of a neutral print. This lap quilt finishes at 52½"x 69½".
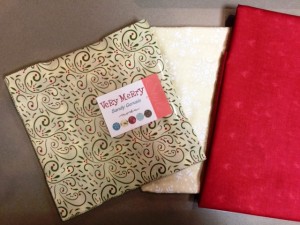
1 layer cake "Very Merry" by Sandy Gervais
1-1/8 yards Neutral Print
7/8 yard Dark (Includes Binding)
3-1/2 yards Backing
Cutting:
From layer cakes:
- Cut each 10" layer cakes as follows:
Cut a 2" strip from one side and then a 2" cut from the top. You will end up with a 8" square. Cut each square diagonally for 2 triangles. 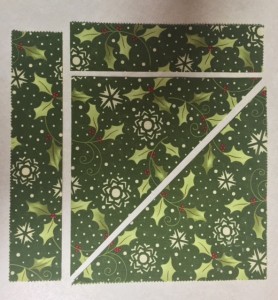
You will have (1) 2" x 8" rectangle, (1) 2" x 10" rectangle and (2) triangles from each 10" square.
From neutral print:
- (4) 8" squares- cut diagonally once for a total of 8 triangles
- (4) 7½" squares
- (6) 3" strips- piece diagonally, then subcut into (2) 3" x 61½" strips and (2) 3" x 49½" strips
From dark:
- (6) 1½" strips- piece diagonally, then subcut into: (2) 1½" x 59½" strips and (2) 1½" x 44½" strips
- (7) 2¾" strips (Binding)
ASSEMBLY:
Separate the triangles into color groupings:
- Red (includes all red prints)
- Turquoise (includes light and dark tones)
- Dark Green
- Pink
- Light Green
- Neutral (These will be used later- use the same Neutral Print for the following step.)
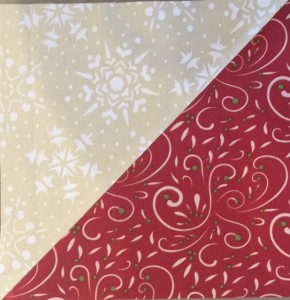
Layer a red triangle with a neutral print triangle. Sew a scant ¼" along the bias edge.
Press seam open. Proof the square to 7½". Make 8. Proofing is a very important part of quilting. To proof your block just means to square it up. You need to look at all sides and points, then center the ruler or square over the top of your block. If you have a diagonal seam, make sure to line up the seam with the diagonal on your square. Trim all sides to the required size.
Sew together in pairs as diagrammed. Make 4 Unit A.
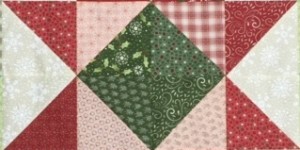
Sew a pink triangle and a dark green triangle together along the bias edge. Press seam open. Proof the pieced square to 7½". Make 4.
Sew the 4 squares together, as diagrammed.
Sew a Unit A to each side. Press seams toward the center.
Sew a 7½" neutral print square to each side of the remaining Unit A's. Press seams toward the squares. Sew to the top and bottom of the center. Press seams away from the center. Proof to 28½".
Layer a turquoise and light green triangle. Sew along the bias edge. Press seam open. Proof to 7½". Make 16 pieced squares.
Sew together in groups of 4 pieced squares as diagrammed. Pay close attention to the direction of the squares. Make 4 Unit B.
Sew a Unit B to each side of the center, making sure the light green triangles are closest to the center. Press seams away from the quilt center.
Sew a turquoise and a dark green triangle together. Proof to 7½'". Make 4 pieced squares.
Sew a pieced square to each end of a Unit B. Sew to the top and bottom of the center, as diagrammed. Press seams away from the quilt center.
Trim (4) dark green and (8) turquoise 2" x 8" rectangles to 2" x 7½".
Sew (4) 2" x 7½" turquoise together and then sew a 2" x 7½" dark green to each end. Sew to the top and bottom of the center. Press seams away from the quilt center.
Sew dark (green, red and turquoise) and light (neutrals and pinks) triangles together. Make 12 pieced squares. Proof to 7½". Sew 6 together, as diagrammed below. Sew to the top and bottom of the center. Press seams away from center.
Quilt should measure 42½" x 59½".
Sew a 1½" x 59½" dark strip to each side of the quilt. Press seams toward the dark. Sew a 1½" x 44½" dark strip to the top and bottom. Press seams toward the dark.
Sew a 3" x 61½" neutral print strip to each side. Press seams toward the neutral print. Sew a 3" x 49½" neutral print strip to the top and bottom. Press seams toward the neutral print.
Sew the remaining 2" rectangles together randomly to make (2) 2" x 66½" pieced strips. Sew to each side of the quilt. Press toward the pieced strip.
Sew the remaining 2" rectangles together randomly to make (2) 2" x 52½" pieced strips. Sew to the top and bottom of the quilt. Press seams toward the pieced strip.
Layer with batting and backing. Quilt as desired.
Bind using your favorite method. I cut my binding 2¾" wide which is a little wider than the standard 2½". I like to stitch my binding on with a 3/8" seam allowance.
This quilt finishes at 52½" x 69½".
I hope you enjoyed this quilt. I would love to see your finished projects. Send a picture to our Facebook page if you'd like to share.
Deborah Jacobs

