Welcome to Moda Fabrics!
Morris Stars Quilt
Morris Stars Quilt
Published:
Oct 18 2021 - 00:00

Hi, Bakers! I'm Heather Long of Coffee and Quilts. Layer Cake and some background fabric make twelve wonderfully big 18" blocks which come together for a generously sized lap quilt.
![]()
This quilt finishes at 62" x 80".
![]()
- 1 Layer Cake®
- 2 3/4 yards background fabric
- 1 yard border fabric
- 4 yards backing fabric
- 5/8 yards binding fabric
![]()
Cutting: From solid, cut (18) 5” x WOF strips. Subcut (144) 5” squares. On (96) of the squares, draw a diagonal line from one corner to the other.
For each A block, choose (4) layer cake squares: 2 for star points, 1 for background squares, and one for center squares with folded corners. Cut each Layer Cake 10” square into (4) 5” squares.
For each B block, choose (2) layer cake squares for star points. Cut each Layer Cake 10" square into (4) 5" squares.
Sewing: Make 6 A blocks. Make star points: Place a solid 5” square on top of a star point square, right sides together and your drawn line on top. Pin together and sew directly on the line.
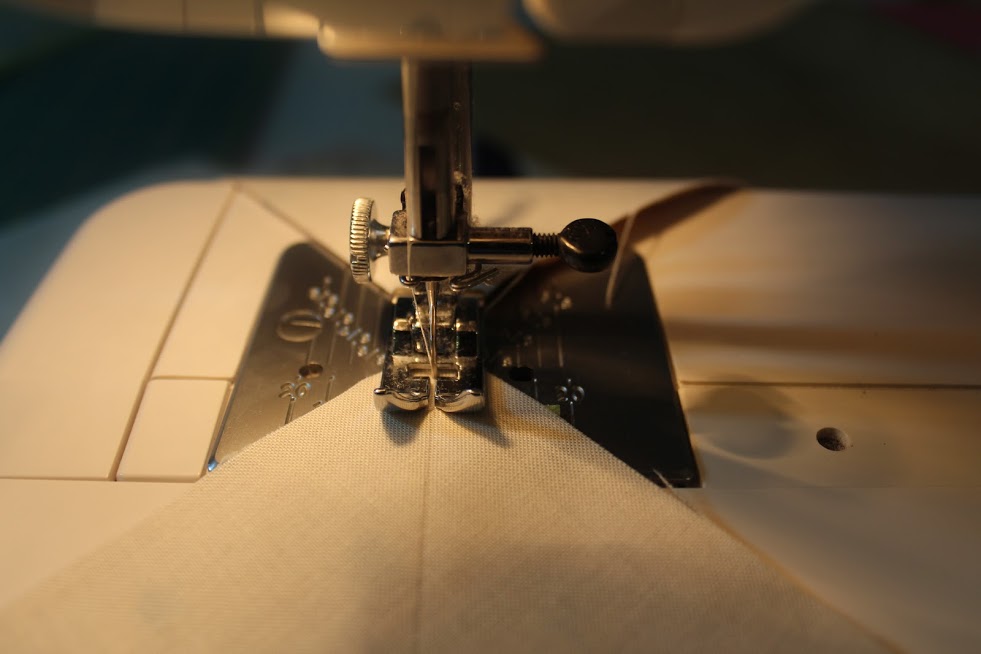
Repeat for all 8 star points. Trim 1/4” away from sewn line, save these triangles. Press half square triangles.
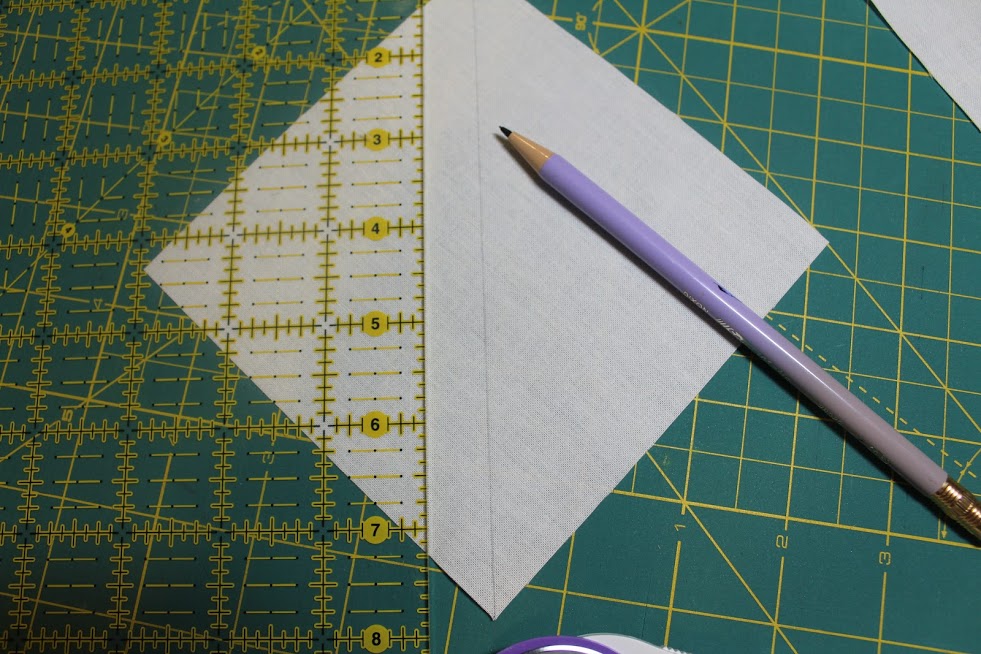
Make star centers: (There are a couple different ways to do these, depending on your preference for trimming and making folded corners. Read through the instructions and choose the method that works best for you!) Layer 2-4 of your solid trimmed triangles. Align the 2 3/4” marks on a ruler with the corner of the triangle as shown and cut.
You may draw a diagonal line from corner to corner on each of these "squares" or simply layer and sew. (Hint: I like to trim my patterned triangles at the same time and save for my B Blocks.) Place one of your 2 3/4" "squares" on one of the center squares, aligning raw edges as shown.
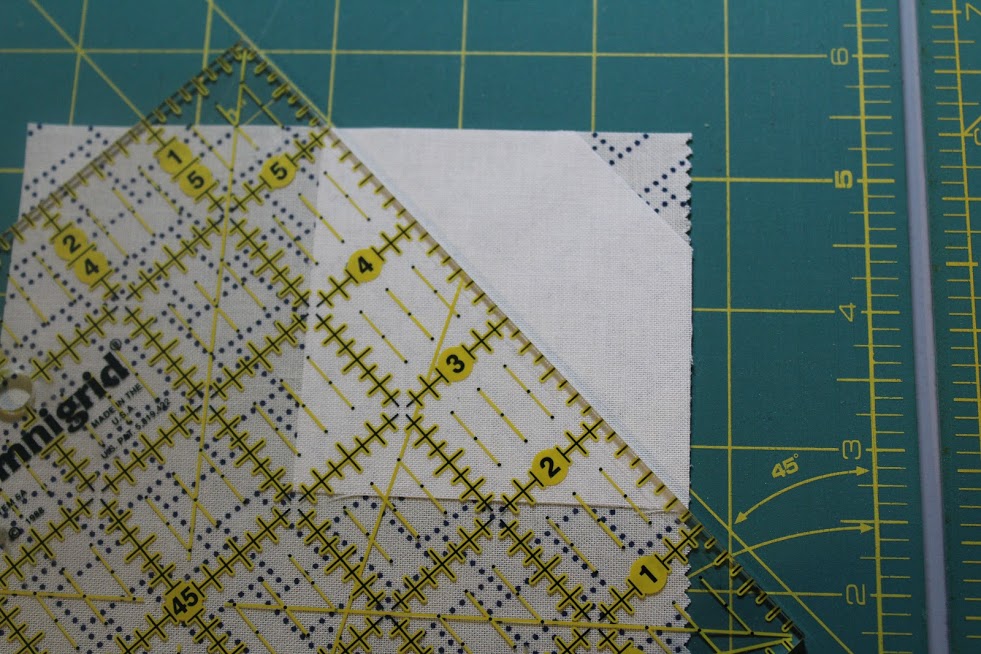
Ruler alignment shows where to draw your line
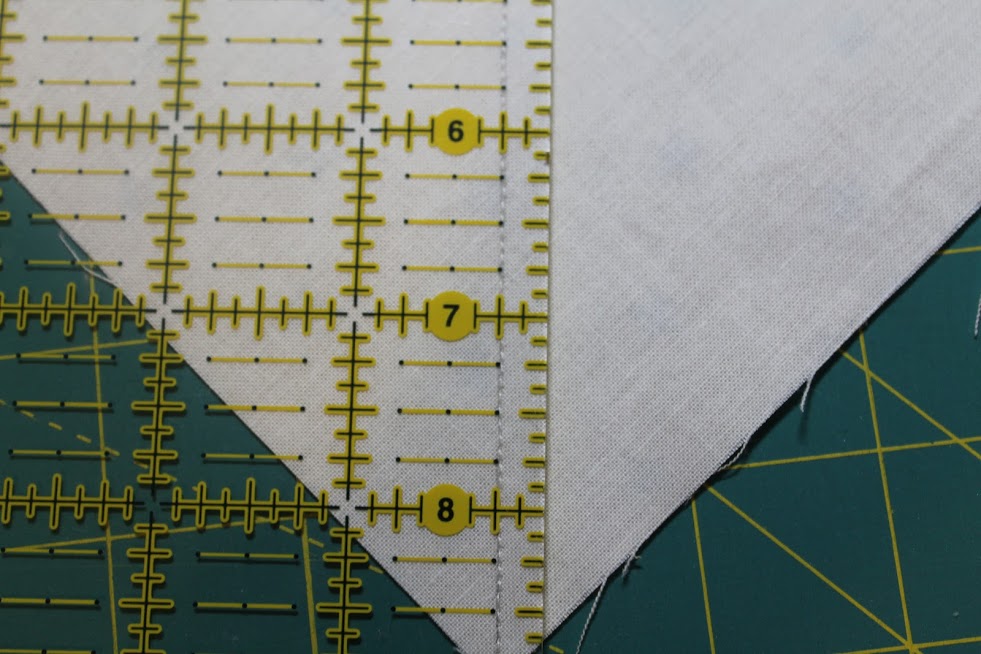
If you've drawn your line, simply stitch directly on the line and then trim 1/4" away from the sewn line. If you have not drawn a line, align your 45-degree line on the ruler with the raw edge of the fabric, cut 1/4" seam allowance, then sew.
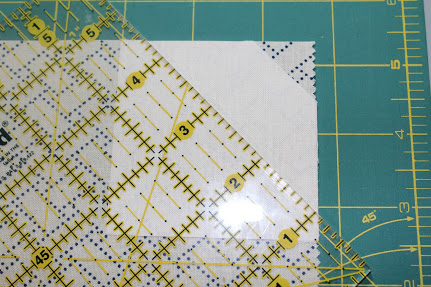
Ruler alignment for trimming
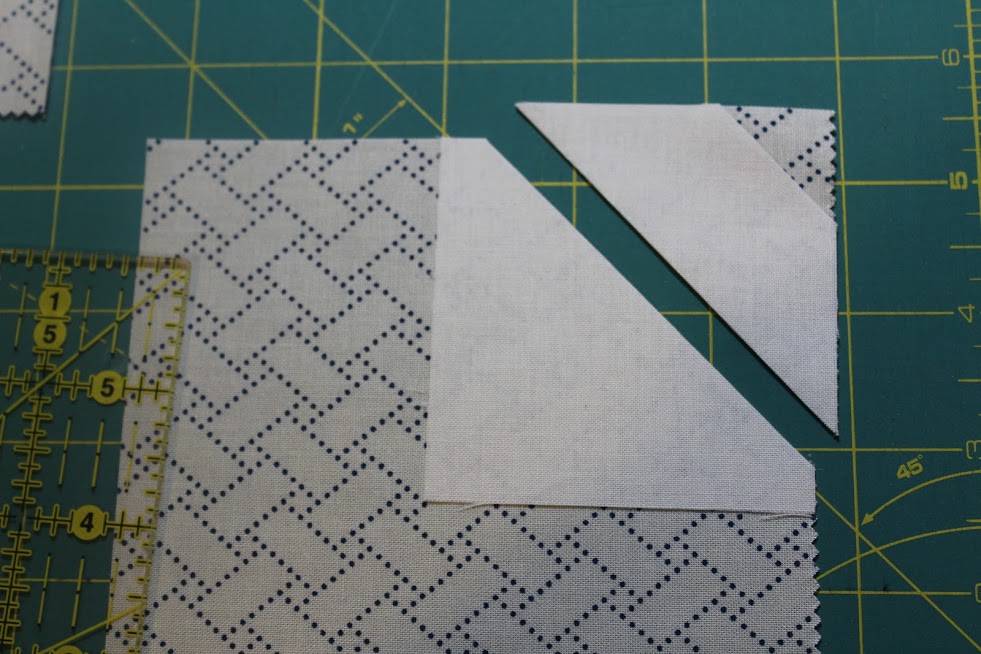
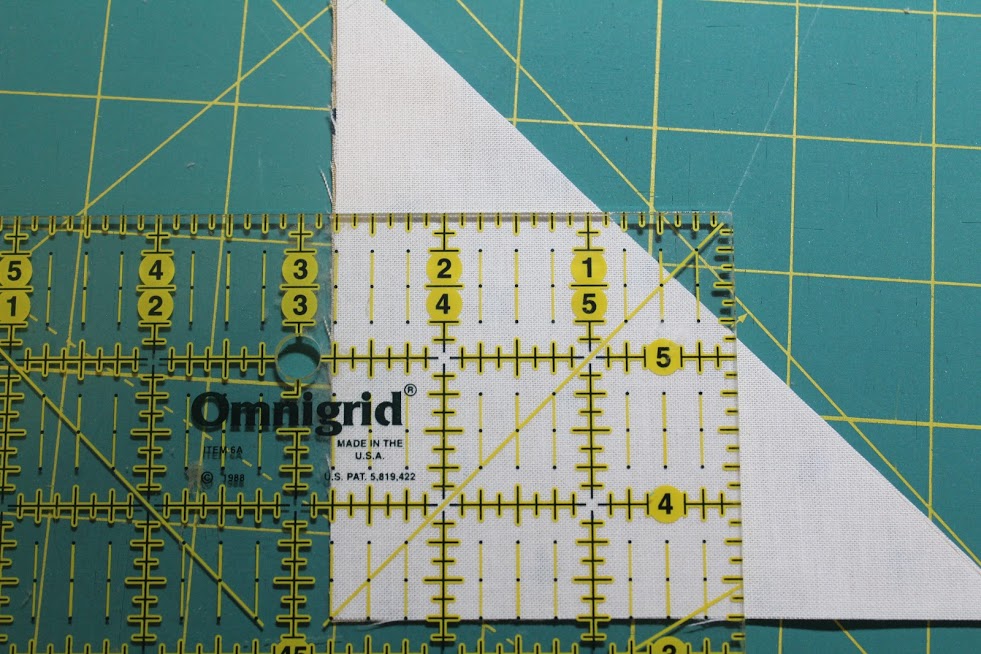
Trimmed corners, ready to sew
Repeat for the opposite corner. Assemble blocks: Arrange the (4) star center blocks into an "X" as shown.
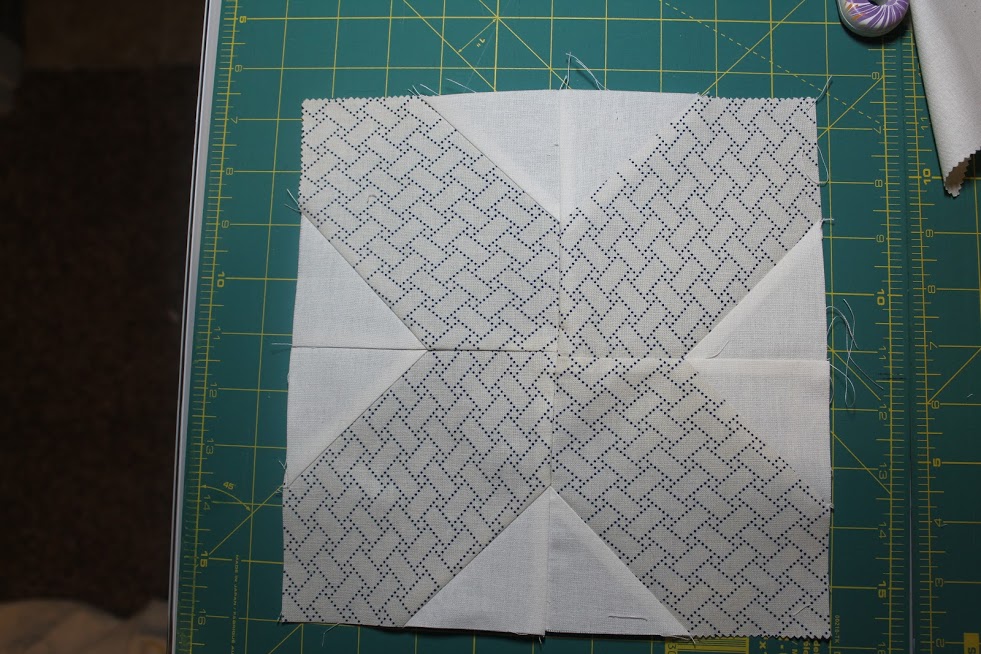
Arrange star points and corner squares around star center. For A Blocks, make sure the solid forms your star points. It will be the opposite for B blocks. Sew each block together by sewing each row of 4 units together and then sewing the 4 rows together.

Make 6 B Blocks. Make Star Points as above with A Blocks. Make star centers: Using triangles that were trimmed from star points, trim to 2 3/4" as above. Use (4) 5" solid squares and (2) sets of trimmed triangles to sew your star centers. Assemble B Blocks as above with A Blocks, using (4) more 5" solid squares for outer corners.

Sew Quilt Top: Arrange blocks into 3 rows of 4 blocks, alternating A and B blocks. Sew blocks together into rows, then sew rows together.
Add Borders: From border fabric, cut (7) 4 1/2" strips. Measure your top for length of borders and piece strips as necessary. Sew borders to sides and then to top and bottom.

Layer, baste, quilt as desired.
Binding: Follow bias binding instructions here to make bias binding or cut (8) 2 1/4" strips from binding fabric and attach to your quilt. Enjoy!
![]()
This quilt finishes at 62" x 80".
Happy Quilting!
Heather Long
{blog: coffeeandquilts.blog}
{instagram: coffee_and_quilts}
{shop: Coffee and Quilts}
{facebook: Coffee and Quilts}
![]()
Posted in: