Welcome to Moda Fabrics!
Building Blocks: 4-from-1 Flying Geese
Building Blocks: 4-from-1 Flying Geese
Published:
Sep 13 2018 - 09:00

![]()
Hi, Everyone! It's Jessica Dayon back in the Bake Shop with you today to share with you how I make 4 at a time flying geese. When I am learning how to make basic quilting blocks, I like to try a few different ways and practice each of them. I think that its good to know all the different ways that you can make one block. This is because one way can work best in different situations. If you are comfortable making it multiple ways, you can pick which way will suit you best each time you make the block. There are three ways to make flying geese blocks: 1- with triangles, 2- the stitch and flip method (that uses corner square triangles), and 3- 4 at a time, no waste flying geese. Today we are focusing on the 4 at a time, no waste method. Let's dive in!
This technique will allow you to make 4 flying geese at a time using squares (no triangle pieces are necessary). Below are instructions for a variety of sizes.
There is a simple formula that you can use to determine the sizes of the squares that you need to create 4 at a time flying geese. You need one square that is your finished geese width plus 1¼” and four squares that are your finished geese height plus 7/8 ”. I have made a chart below that has the calculations made out for some sizes for you and also the precuts that you can use to make these. However, you can follow this formula to make any size geese that you'd like.
| Precuts that can be used | Finished Geese Size | Size of Larger square | Size of Smaller squares |
| Charm pack (for the large) & Mini Charm pack (for the small) | 1½” x 3” | 1- 4¼” square | 4- 2 3/8 ” |
| Layer Cake (for the large) & Charm pack (for the small) | 2” x 4” | 1- 5¼” square | 4- 2 7/8 ” |
| Layer Cake (for the large) & Charm pack (for the small) | 2½” x 5” | 1- 6¼” square | 4- 3 3/8 ” |
| Layer Cake (for the large) & Charm pack (for the small) | 3” x 6” | 1- 7¼” square | 4- 3 7/8 ” |
| Layer Cake (for the large) & Charm pack (for the small) | 3½” x 7” | 1- 8¼” square | 4- 4 3/8 ” |
| Layer Cake (for the large) & Charm pack (for the small) | 4” x 8” | 1- 9¼” square | 4- 4 7/8 ” |
![]()
Use the chart above to find the exact size geese that you'd like to make and then use the corresponding precuts to make the large square and four small squares.
![]()
You'll start out with one large square and four smaller squares.

Draw a diagonal line on the back of all of the smaller squares. Line up two smaller squares along the diagonal of a larger square, right sides together (the middles will overlap). Sew ¼” away from the center line on both sides.

Cut on the center line.

Press the units, pressing the seam allowance toward the smaller triangles. Take care not to distort the fabric when pressing.
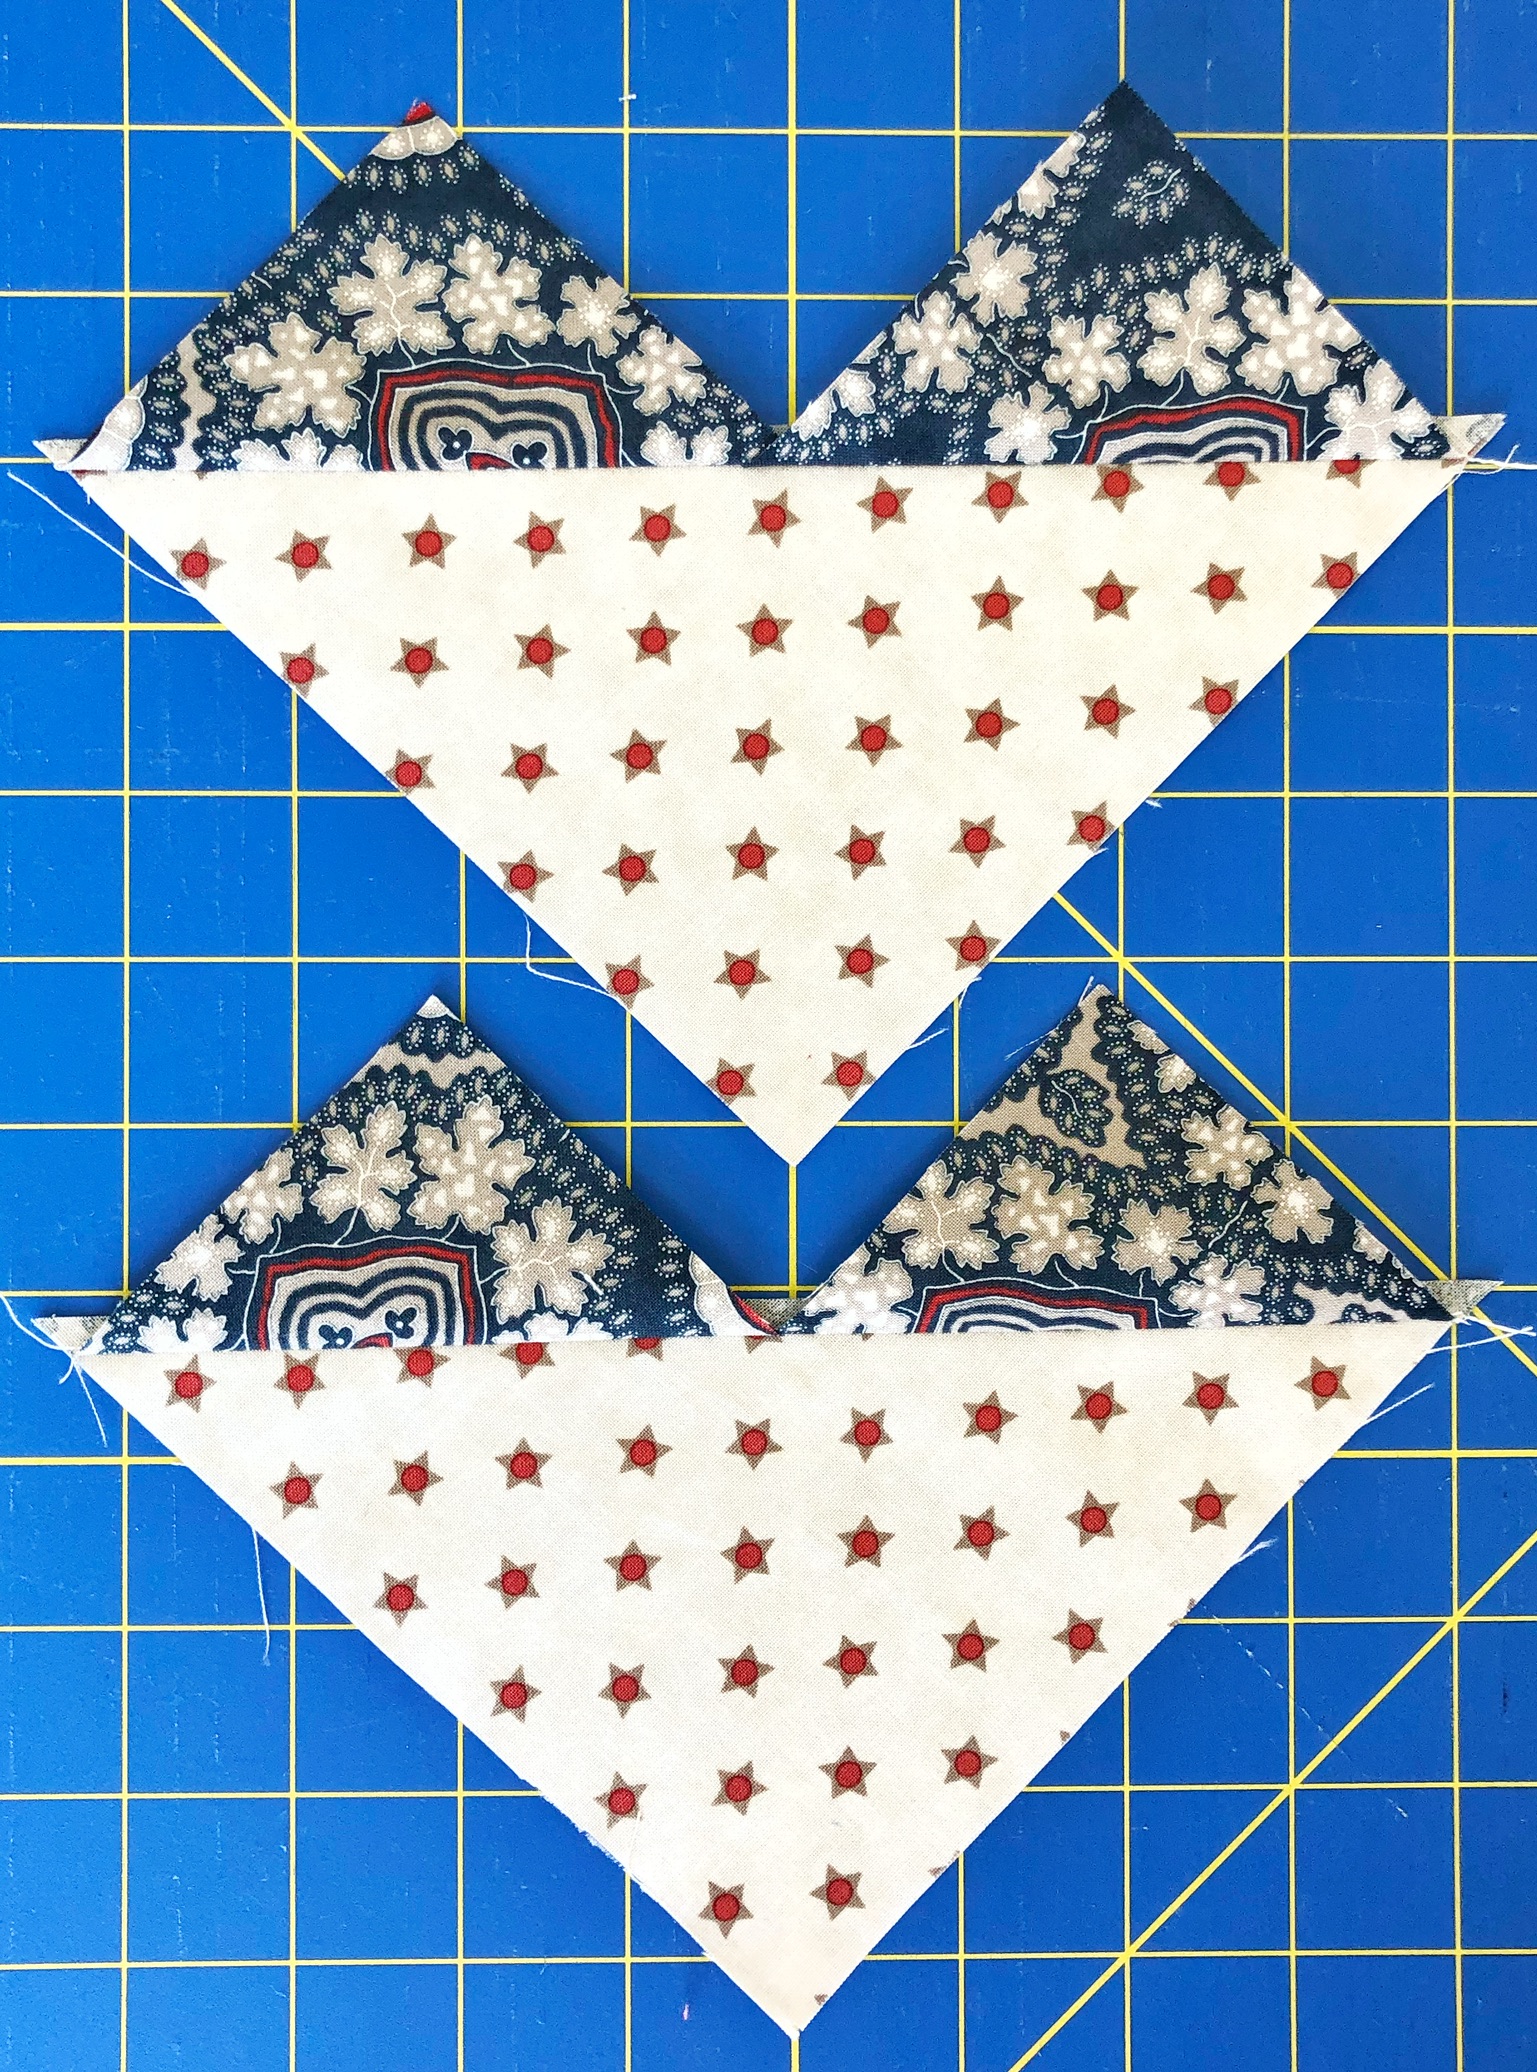
Next, line a smaller square up with the corner as shown. Sew ¼” away from the center line on both sides.

Cut on the center line.

Press the units, pressing the seam allowance toward the smaller triangles. Again, take care not to distort the fabric when pressing.

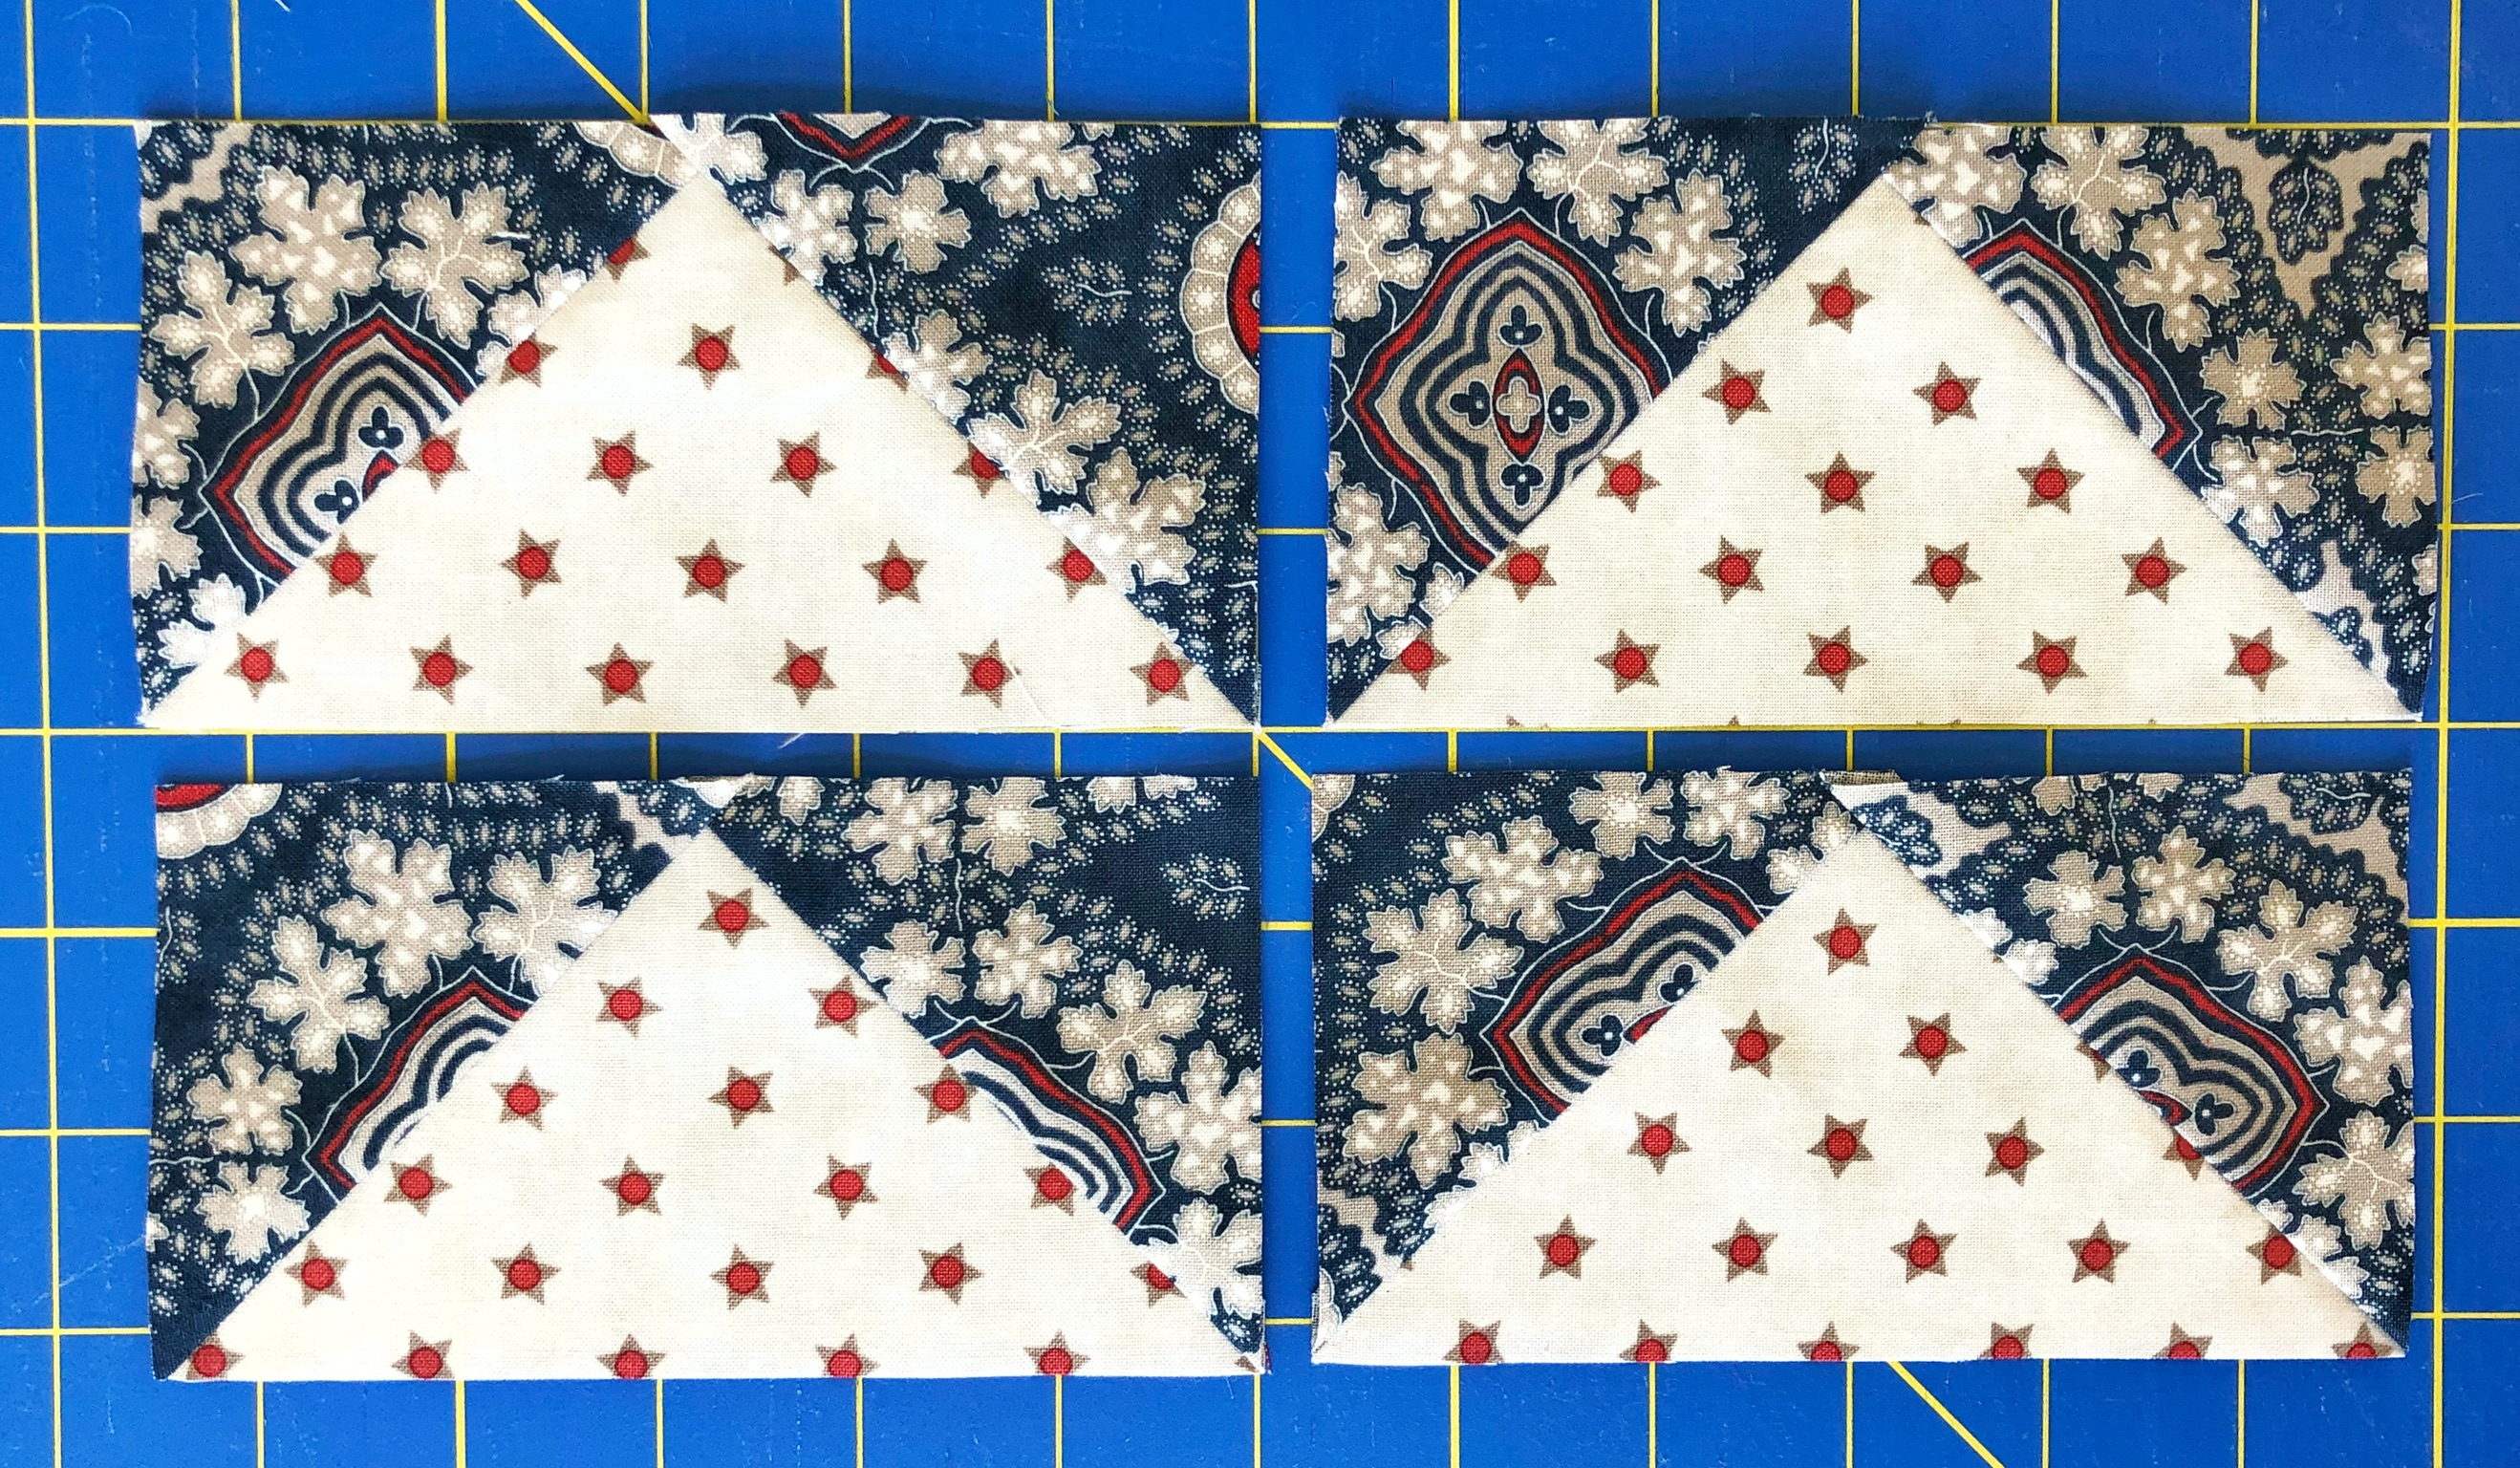
Trim the dog-ears and you get four perfectly sized flying geese with fabric waste at all!
![]()
This will yield 4 flying geese at your chosen size.
I hope you enjoyed this tutorial and will give this method a try. It makes really quick work of flying geese!
Jessica Dayon
{blog: jessicadayon.blogspot.com}
{instagram: @jessicadayon}
{shop: Jessica Dayon Pattern Shop}
![]()
Posted in:
Comments