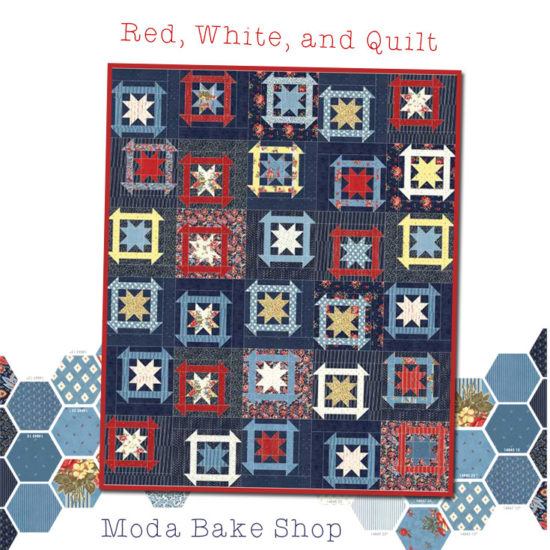

This quilt/project finishes at 85" x 102".

1 Fat Quarter Bundle {Ann's Arbor by Minick and Simpson}
7 yards background fabric
7-1/2 yards backing fabric
1 yard binding fabric

From the background fabric, cut:
(30) 5-1/4” squares
(120) 2-1/2” squares
(60) 2” x 18” strips
(30) 5-1/2” squares
(30) 14-1/2” x 3-1/2” strips
(30) 17-1/2” x 3-1/2” strips
From your fat quarter bundle, choose (30) fat quarters that work well with, and don't blend into, your background fabric. From each fat quarter, cut:
|
Label as Star
|
Label as Churn Dash
|
|
(4) 2-7/8” squares, draw diagonal on back
|
(2) 2” x 18” strips
|
|
(1) 4-1/2” square
|
(1) 5-1/2” square
|
Sewing Instructions
All sewing instructions assume a scant 1/4" seam allowance. We will be making 4 (9/16/30/36) blocks. The following directions are to make ONE block. Repeat to make the quantity needed for your size quilt.
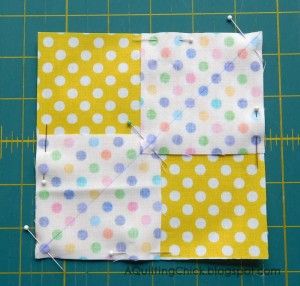
- Place (2) 2-7/8” squares on top of (1) 5-1/4” square, right sides together, as shown. The center corners will overlap. Pin as shown.
|
 |
-
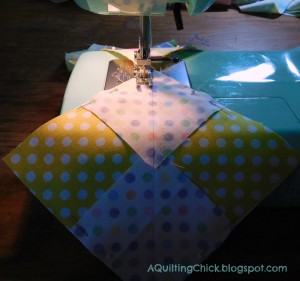
Sew a scant 1/4” seam on each side of the diagonal line as shown.
|
 |
-
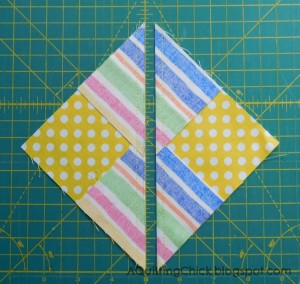
Cut on your drawn diagonal line and press open.
|
 |
-
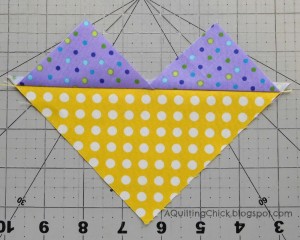
You will have two pieces that look like the picture to the right.
|
 |
-
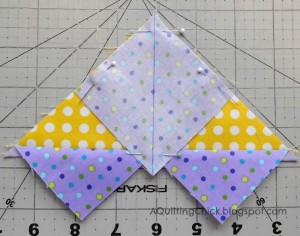
Pin a 2-7/8” square to the corner of your partial flying geese. Pin as shown. Repeat for both of the partial flying geese pieces.
|
 |
-
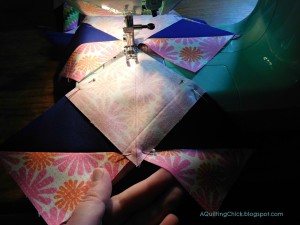
Sew a scant quarter inch seam on both sides of your drawn line, as shown.
|
 |
-
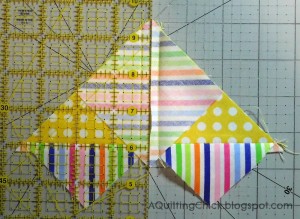
Cut on your drawn line and press open. You will now have 4 flying geese units. Square up to 2-1/2 x 4-1/2”.
|
 |
-
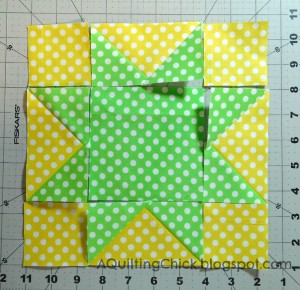
Arrange (4) flying geese units with (1) matching 4-1/2” square and (4) 2-1/2” background squares as shown.
|
 |
-
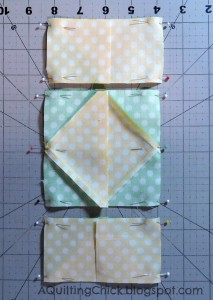
Sew into three rows. Press seams away from the flying geese units.
|
 |
-
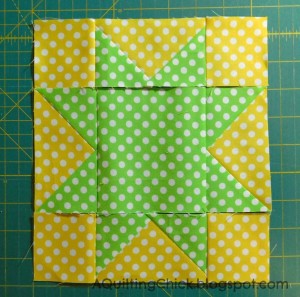
Arrange your rows as shown.
|
 |
-
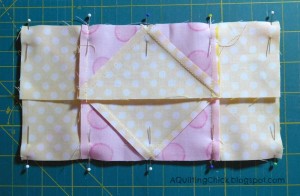
Layer the top and bottom row over the middle row as shown. Pin along the long edges and sew. Press open and set aside.
|
 |
-
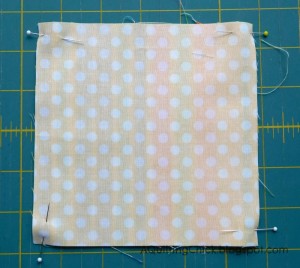
Layer one 5-1/2” background with one 5-1/2” square from your fat quarter, right sides facing. Pin all sides together as shown. Sew on all four sides.
|
 |
-
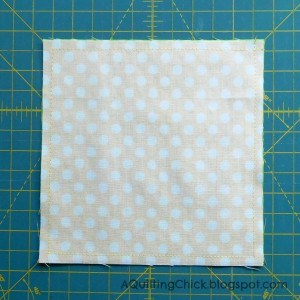
Now lineup your squares on your cutting mat, using the 90-degree angle lines as shown.
|
 |
-
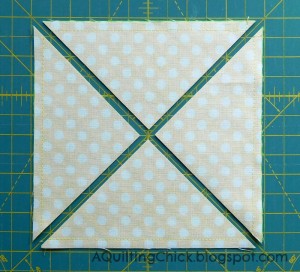
Cut on both diagonals to create (4) half-square triangle (HST) units. Press open. Square up to 3-1/2”.
|
 |
-
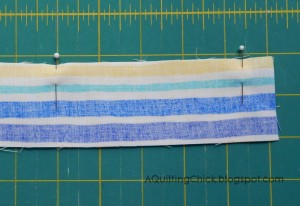
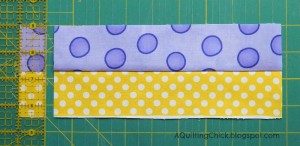
Match up one 2”x 18” fat quarter strip with one 2” x 18” background strip and pin along one long edge.
|
 |
-
Sew along the long edge and press open. Subcut each unit into (2) 3-1/2” x 8-1/2” strips, giving you (4) matching strip sets.
|
 |
-
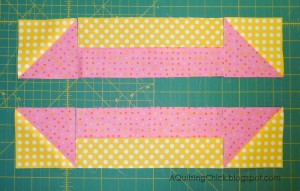
Arrange (2) of the strip sets with (4) matching HST units as shown.
|
 |
-
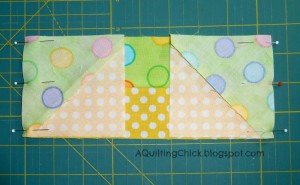
Pin each row as shown and sew along the short edges. Press toward the strip sets.
|
 |
-
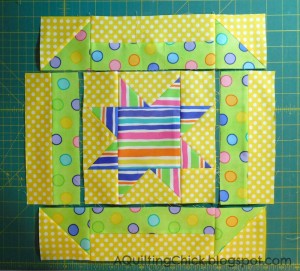
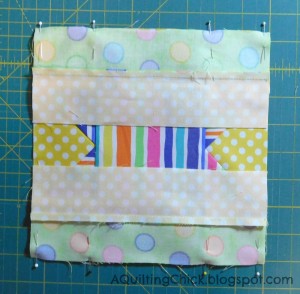
Arrange your blocks as shown, using contrasting stars and churn dash units.
|
 |
-
Pin the strip set units from the center row to the sides of the star blocks. Sew and press open toward the strip set units.
|
 |
-
Combine all three rows into your completed blocks.
|
 |
-
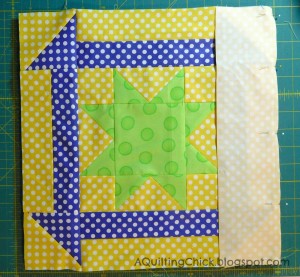
Pin a 14-1/2” x 3-1/2” strip to the right side of each block and sew. Press open.
|
 |
-
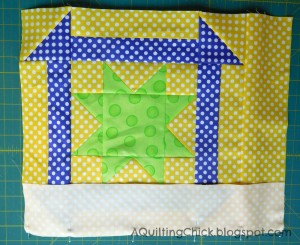
Pin a 17-1/2” x 3-1/2” strip to the bottom of each block and sew. Press open.
|
 |
-
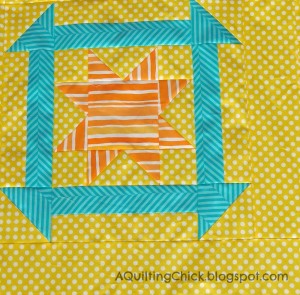
Your blocks are done!
|
 |
Arrange your blocks in a pleasing manner, using the diagram below as a guide. I'm showing you two rows below, but repeat the layout twice more to complete all 6 rows. Make sure you watch the sides that your sashing is on. This makes your blocks dance!
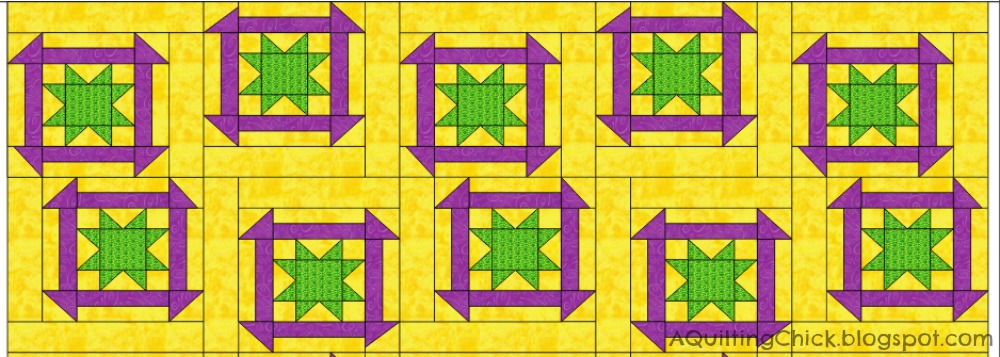
Now sew your blocks into rows, watching to make sure you don't mess up the alignment, then sew your rows together to complete your quilt top!! Quilt and bind as desired.
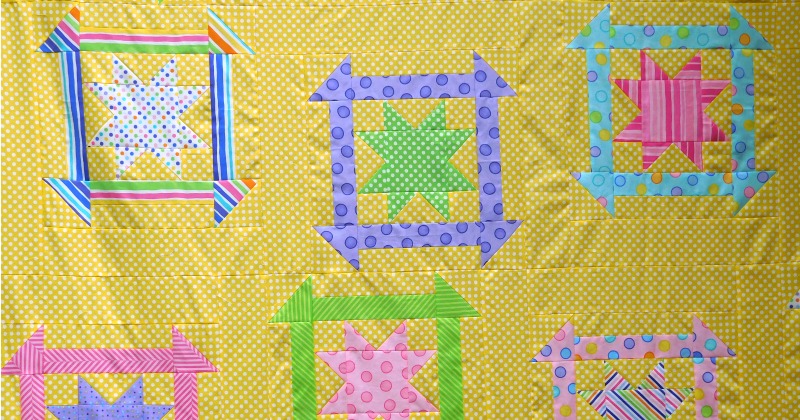

This quilt finishes at 85" x 102".
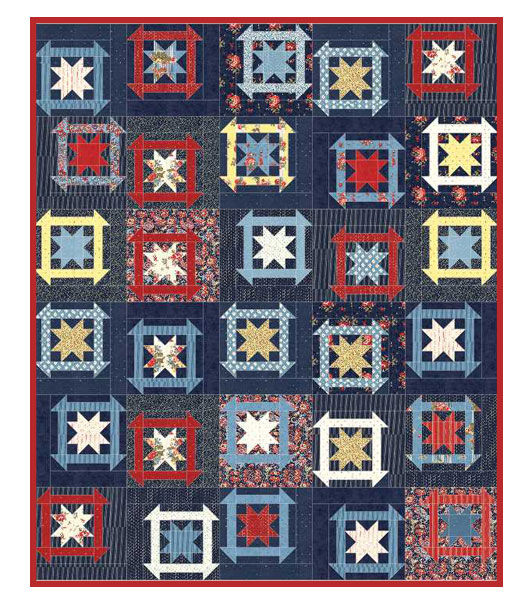
Every time I see this quilt, I fall in love with it a little bit more. It has so much movement and the fabrics are so bright and cheerful that you can't help but smile! Please stop by my blog at AQuiltingChick.blogspot.com and see what else I've been up to. I truly hope you enjoy making this one as much as I did!
*hugs*
Cathy Smith
AQuiltingChick.blogspot.com

Save
Save
![]()


Comments