Welcome to Moda Fabrics!
A Little Off Kilter Quilt
A Little Off Kilter Quilt
Published:
Jun 28 2017 - 23:00
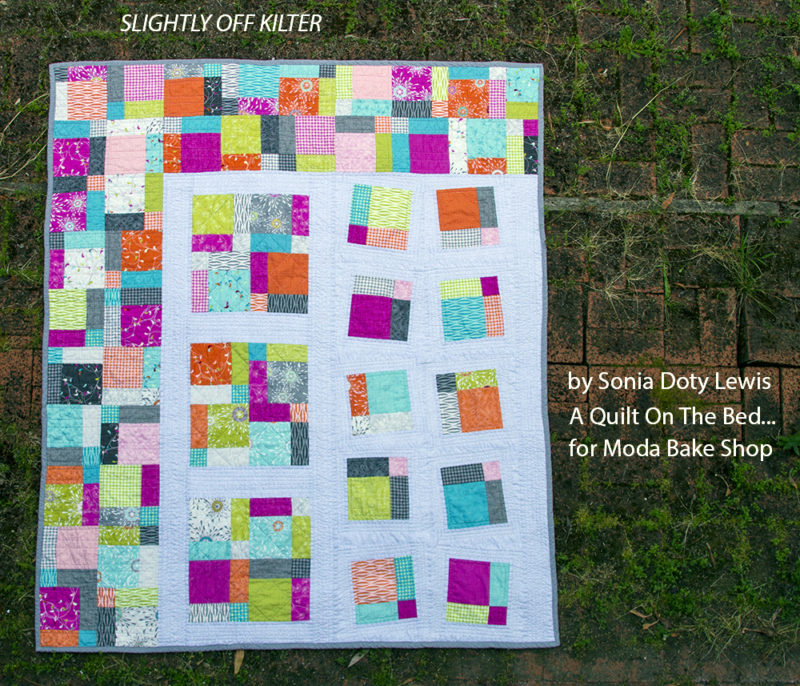

Hi, my name is Sonia Lewis. I love to quilt and experiment with fabric and colors. I am currently interested in creating quilts that are improvisational and asymmetrical. I am most influenced by artists like Frank Stella, Richard Diebenkorn, and Stuart Davis. "Slightly Off Kilter" is my first Moda Bake Shop quilt.
This quilt finishes at approximately 52" x 63"
![]()
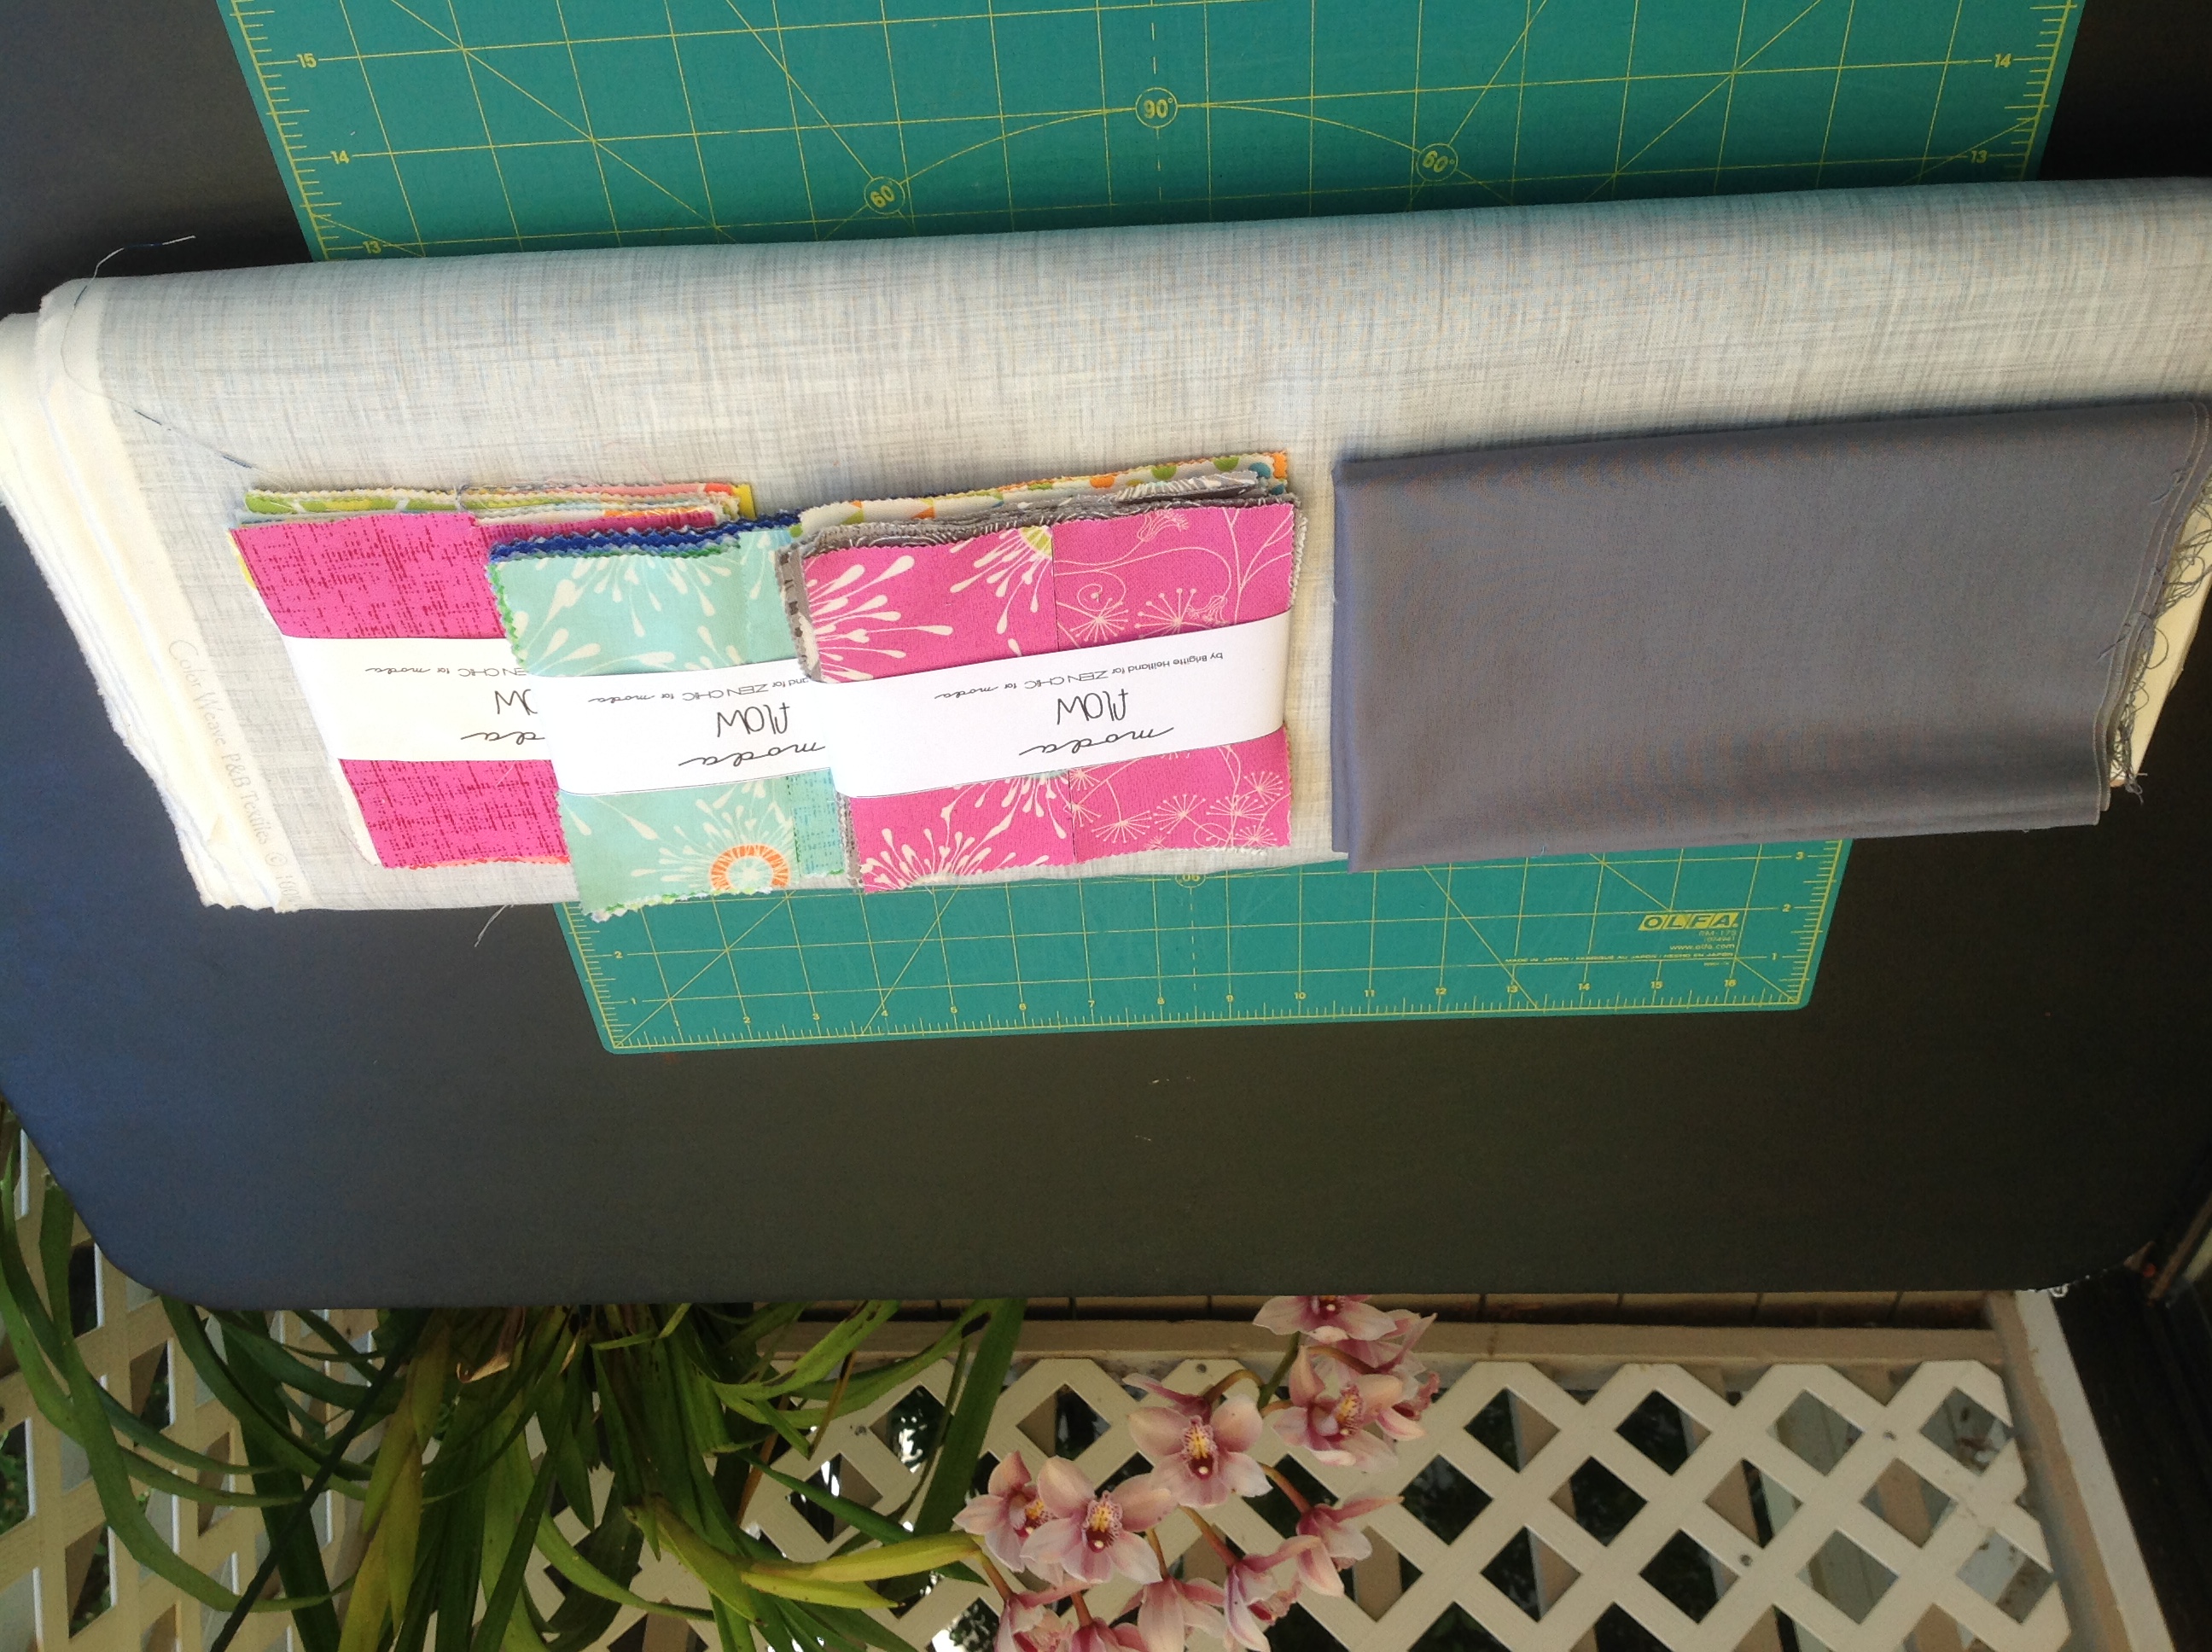
3 Charm Packs of Flow by Zen Chic for Moda
1 3/4 yards background fabric (I used light grey)
4 yards backing fabric
3/4 yards binding fabric (I used dark grey)
![]()
This quilt is constructed in three vertical sections and one horizontal section. The horizontal section is the last section added and is at the top of the quilt. The vertical sections are sewn together from left to right. The quilt is made up of disappearing nine-patches and background sashing.
BACKGROUND
Cut the background into sixteen strips that measure 3 1/2" x WOF. Sew strips together and subcut as follows:
Sew four strips together end to end and subcut into three 3 1/2" x 53" sections. One of each of these strips will be sewn to the right side of Sections I, II, and III. Save the remaining fabric for additional cuts.
Sew two strips together end to end and subcut into four 3 1/2" x 13 1/2" strips. These will be used in Section II. Save the remaining fabric for additional cuts.
Sew the remaining ten strips together end to end. Sew the fabric leftover from your first two series of cuts end to end and then to the end of the ten strips. Subcut this long strip into twenty 3 1/2" x 7" strips and twenty 3 1/2" x 13 1/2" strips. These strips will be used as the border strips in Section III. Save any leftover fabric as you may need it as you assemble Sections I, II, and III.
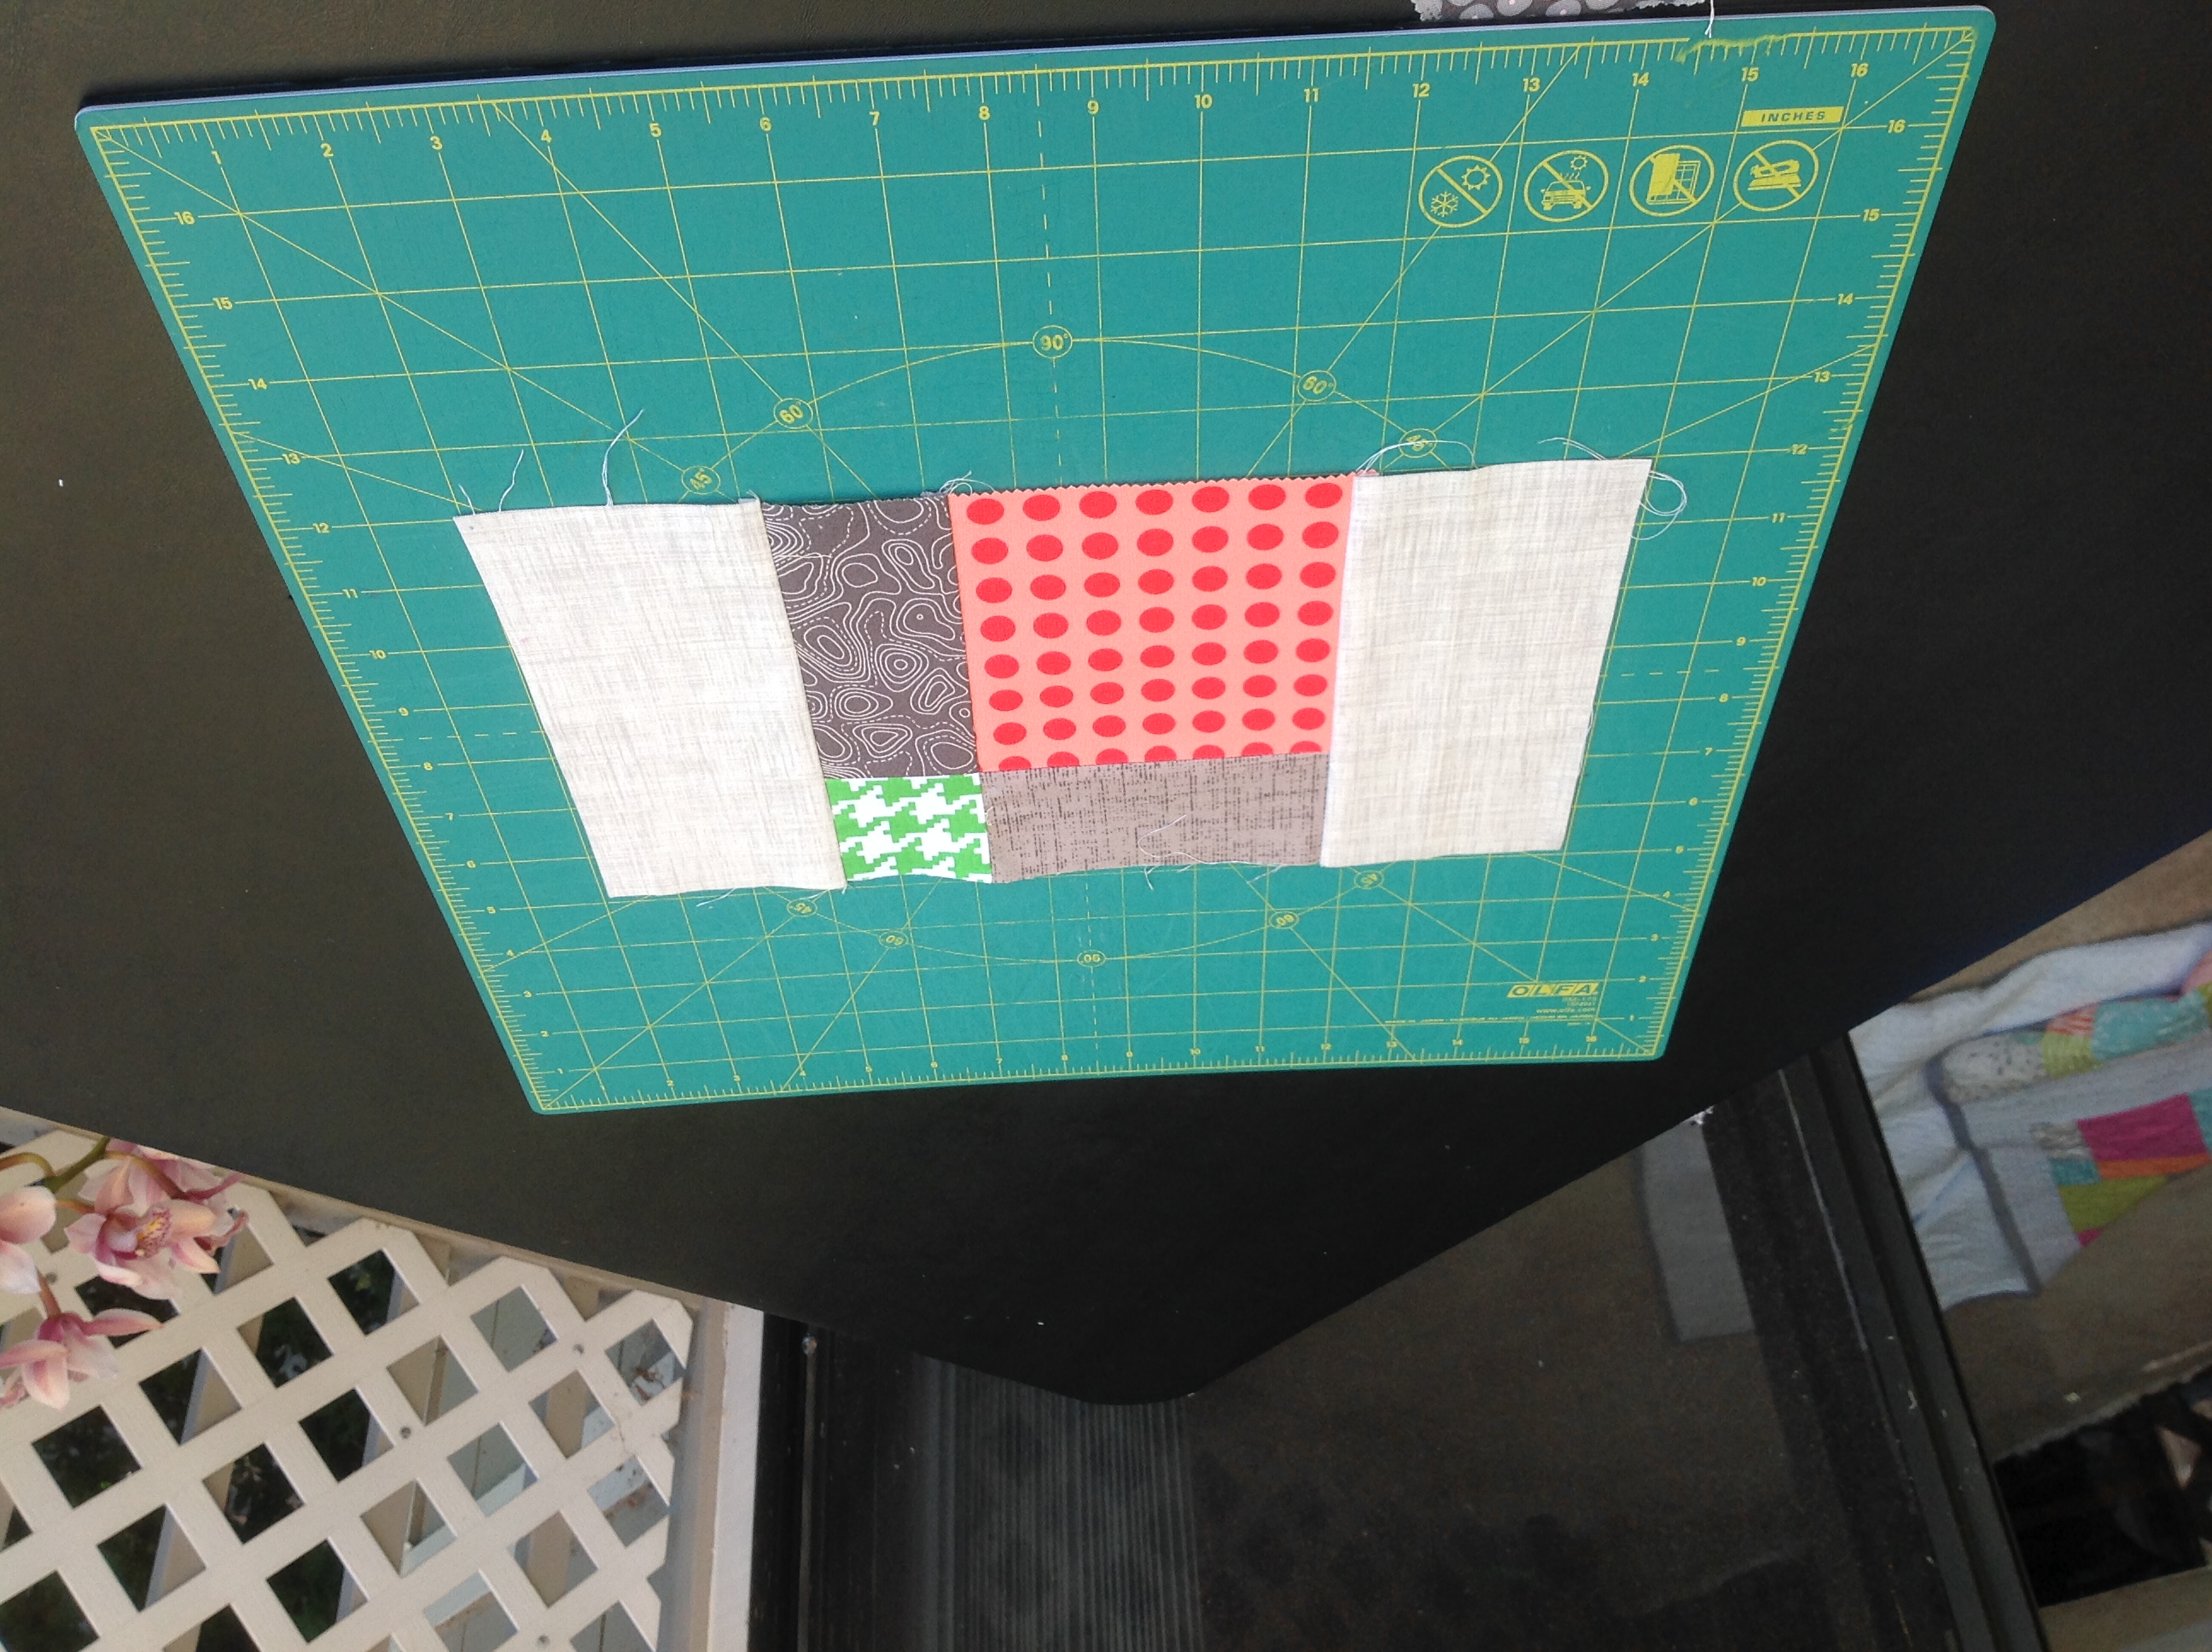
DISAPEARING NINE-PATCH

Sew Charm Squares into fourteen 9-patch blocks.

Cut each 9-patch in half both vertically and horizontally. You will have a total of 56 blocks.
SECTION I

Take sixteen of the blocks you cut from the 9-patch blocks and arrange them into 4-patch blocks. You will end up with four 4-patch blocks. Sew these four blocks into a row. Holding the row VERTICALLY, sew a 3 1/2" x 53" sashing strip to the right side of the row. The sashing row will probably be a little long, but you can trim it later.
SECTION II
Take twelve of the squares you cut from the 9-patch blocks and sew into 4-patch blocks as you did for Section I. This time you will have three 4-patch blocks. Sew a 3 1/2" x 13 1/2" sashing strip to the right side of each block. Sew the three blocks together into a row. Add a 3 1/2" x 13 1/2" sashing to the left side of the row. Align the row VERTICALLY and sew a 3 1/2" x 53" sashing to the right side of the row. Again, the sashing will probably be too long, but you can trim it later.
SECTION III
Take ten of the blocks you cut from the 9-patch blocks and sew a 3 1/2" x 7" sashing strip to two opposite sides. Do this to all ten blocks.

Sew a 3 1/2" x 13 1/2" sashing strip to the remaining two opposite sides of the block. Do this to all ten blocks.

Trim each of the ten blocks to 10" square. Be sure to off center the colored portion of the block. Sew the trimmed blocks into two rows of five blocks each. Sew the rows together. Align the rows VERTICALLY and sew a 3 1/2" x 53" strip of sashing to the right side. Once again, you will probably have to trim the sashing.
SECTION IV
Take remaining 18 blocks you cut from the 9- patch blocks and sew 16 of them together into four 4-patch blocks as you did in Section I. Again as in Section I, sew the four 4-patch blocks into a row. Sew the last two blocks together and add to the right side of the row.
ASSEMBLING THE QUILT
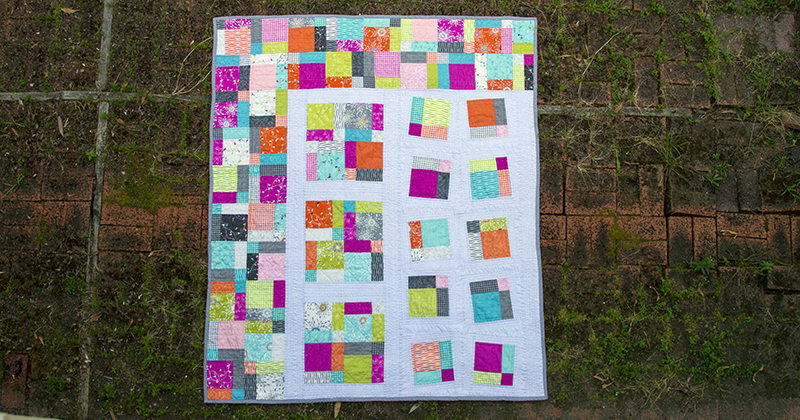
Referring to the above picture, layout the first three sections of your quilt in numerical order from left to right, i.e., Section I, Section II, Section III. Be sure to align the sections VERTICALLY. Sew the sections together. You may find that Section IV is just a little shorter than Sections I and II. If you do, add a thin strip of background at the bottom of Section IV so that all three sections are the same length.
Take Section IV and sew it HORIZONTALLY across the top of Sections I, II, and III. On the right side, trim Section IV to fit after you have sewn it to the rest of the quilt.
![]()
This quilt finishes at approximately 52" x 63"
I hope that you have as much fun making this quilt as I did. You can see more of my quilts on my Instagram account: @soniadotylewis. Most of my quilts are approximately 50" x 60", are labeled with two labels, "A quilt on the bed..." and "Quilts for Becca", and are donated to UCSF Benioff Children's Hospital in San Francisco. "Quilts for Becca" honors the memory of the 15-year old granddaughter of wonderful friends of ours. Becca died of a rare cancer two years ago. The remaining quilts are custom made, range in size from throw to king size, and are sold with the label "A quilt on the bed...".
Sonia Doty Lewis
Instagram: @soniadotylewis
![]()
Posted in:
Comments