Welcome to Moda Fabrics!
Binding: A Tutorial with Paper Box Quilt Co.
Binding: A Tutorial with Paper Box Quilt Co.
Published:
Jun 17 2014 - 10:33

Hi there friends! I'm Jessie from Paper Box Quilt Co. (Inside The Paper Box) and I'm stopping in to bring you a tutorial on how to bind your quilts. I have been asked, mostly on Instagram (InsideThePaperBox), how I get my binding so "nice" or how I get my corners so "perfect", so I thought I would share what works for me!
When I started quilting I searched for tutorials online about all the different steps of quilting and used a collaboration of many methods to figure out what worked for me. That was about 5-6 years ago, and recently, I was thinking "why post a tutorial on binding? Everyone knows how to bind!" FALSE. It was like I forgot I was once looking, myself, for tutorials on the basics of quilting. So, I hope, if you are just learning, re-learning, or looking for a new method, that this binding tutorial is helpful. Let's get started, shall we? (Please excuse the picture overload about to take place. I find tutorials with pictures to be the most helpful)
To begin, you'll need to determine your length of binding to cut. Measure the length and width of your project (Ex. Crib Quilt = 45"x60"). Add your lengths together and multiply by 2 (45"+60"=105") (105"x 2=210"). Then you'll want to add 10"-20" to allow for mitered corners and all your joining (210"+20"=230"). So 230" of binding total. Now, how many strips to cut? Measure the useable width of fabric (WOF) of your binding fabric. Maybe you're using a yard piece of fabric which would be about 42" or maybe you're using a fat quarter for a smaller project which would be about 22". For our example we will use 42", so take your total length of binding and divide it by your useable WOF (230"/42"=5.476). Round up to the next number and you'll need to cut 6 strips. (I wanted to include calculations, but for anyone with smartphone access, there are apps that you can use for figuring all kinds of quilty calculations, including binding length, width, cutting instructions).
Okay, so we know we need to cut 6 strips, but how wide? I cut mine 2"-2.5" depending on the project. It's really a personal preference on how big you want your binding to be. I'd say 2.75" is a good width, so 6 strips, 2.75" wide for this example.
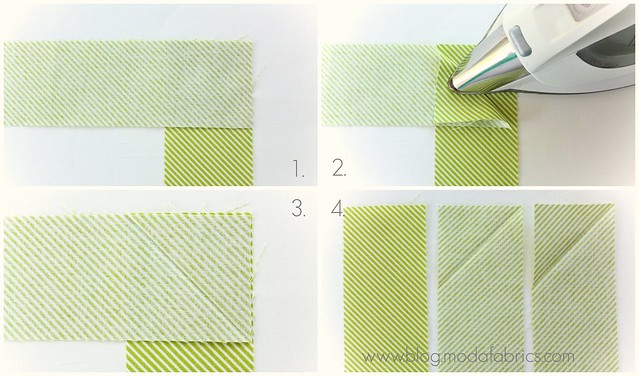
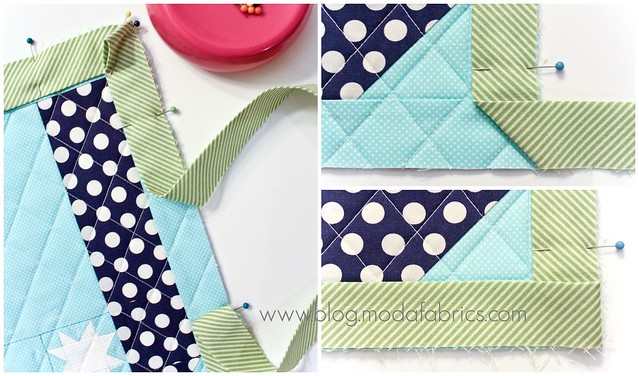
Sewing our binding together. I like to put mine together with an angled seam to cut back on bulk. Lay out your strips on your ironing board as seen below in image 1, lining up your corners in a right angle, right sides together (RST). Pull back the top right corner of the top strip to where the fabrics come together in the right angle (image 2) and press. This will create a nice angled crease that you will use as a guide to sew your strips together (image 3). Do this to all your strips and end with one flat strip and all the rest creased (image 4).
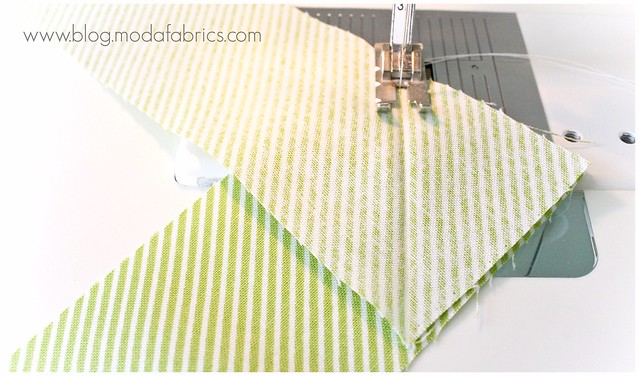
Starting with your un-creased strip, line them up, RST, in a right angle as you did above for pressing and sew along your crease. Continue until you have all strips sewn together in this manner.
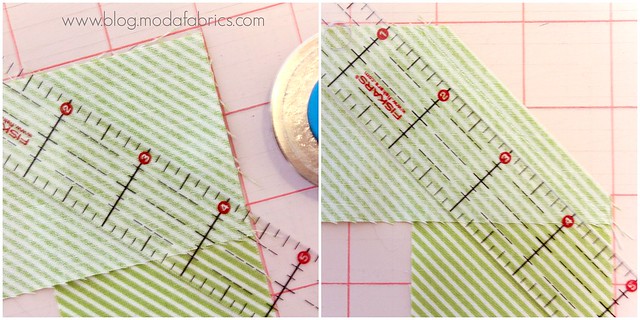
Trim all your "corners" off your strips 1/4" from your seam (below).
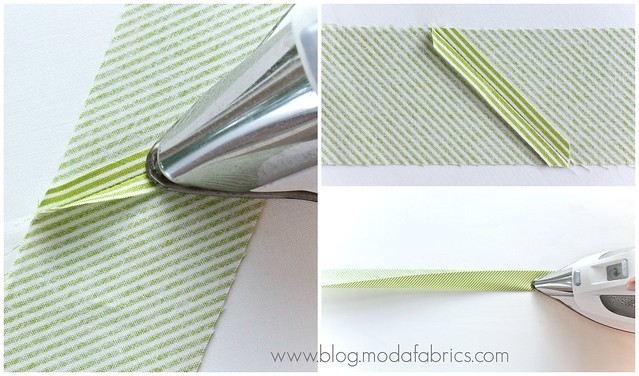
Press the seams open. This cuts back on bulk later when you sew your binding to your project. Then press your binding in half (bottom right). If you have cut your strips 2.75" this will leave your folded/pressed binding measuring 1.375" wide.
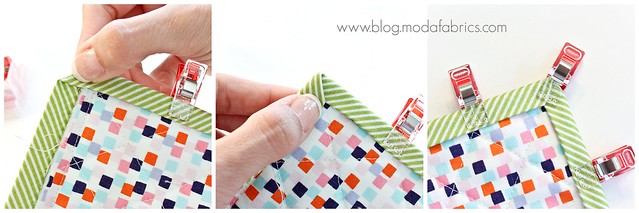
Pin the binding to your project, lining the raw edge against the outside of your quilt. Leave a generous "tail" (I leave like 10" or so) on both the beginning and ending of your binding (left) and make sure you leave a nice big space between both. I leave 10"-15" when possible, to leave enough space for joining your binding later. For your corners, fold your binding strip backwards, off the quilt as shown below, top right, so that you create an angle fold and so that your strip is completely straight off your quilt. Then fold the binding back over the top of your quilt, creating a straight corner and lining up your edges again (bottom right). (This is kind of hard to explain, I hope the directions are clear and the images are helpful). You can see the pinned corner in the image on the left, it leaves a little folded "tag".
Starting at your first pin, sew your binding to your quilt using a 1/4" seam allowance and securing the end with a backstitch.
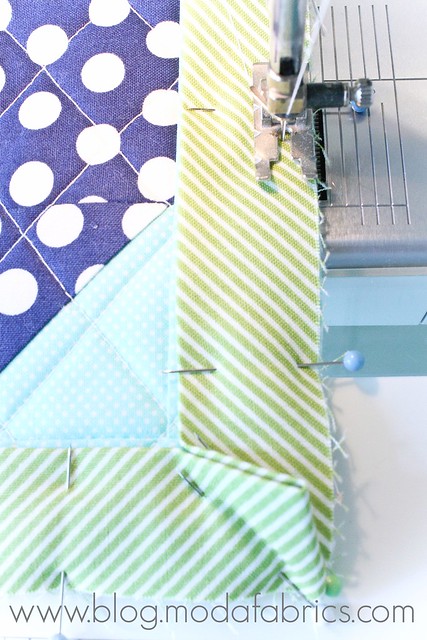
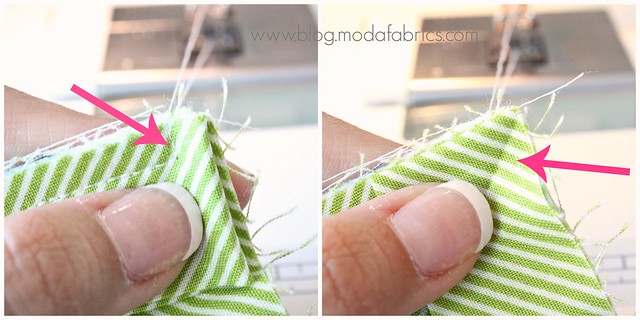
When you approach your corner, slow your stitch and stop 1/4" from the edge of the quilt. Turn your work and backstitch off the quilt (below, left). Pull your work off the machine. (I don't actually clip my thread at this point, just keep them attached) Flip that little corner tag over the edge that you just stitched (below, right) and you'll start your stitching again, 1/4" from the edge on your next side. You can see in my image below, there's a bit of a crease, I like to use that as a guide for lining up my needle. Secure your stitches with a backstitch and sew along your new side repeating the above steps for all 4 corners. Sew to your last pin making sure to leave that nice big gap for joining your ends.
Place your work on your ironing board with the ends accessible. Line up both ends along the edge of your work, folding them back near the center of your gap. Next is a little "trick" I use to avoid pinching or overlapping my binding, I leave about 1/8' space between my ends where I want to sew them together (below). I find that leaving that little space makes my binding tighter and more accurate after stretching/shifting occurs when sewing it down. (This is just something I found that works for me, just from a little experience with sliding/shifting binding). Press to crease.
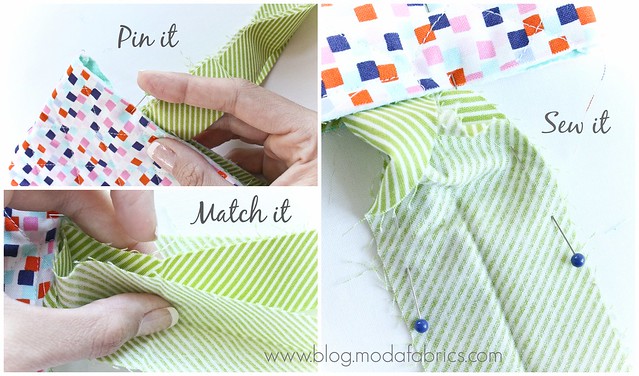
Fold your "gap" in half, lining up the edges of where your binding starts and stops and PIN IT (top left). This will just help a little with your "struggle" when you sew your ends together. Find the creases you created above and MATCH them up, RST and pin, making sure NOT TO TWIST YOUR BINDING (bottom left). Then, SEW along your crease! (right & below).
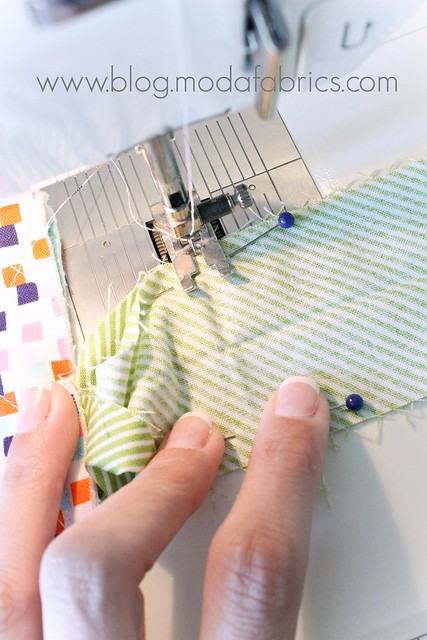
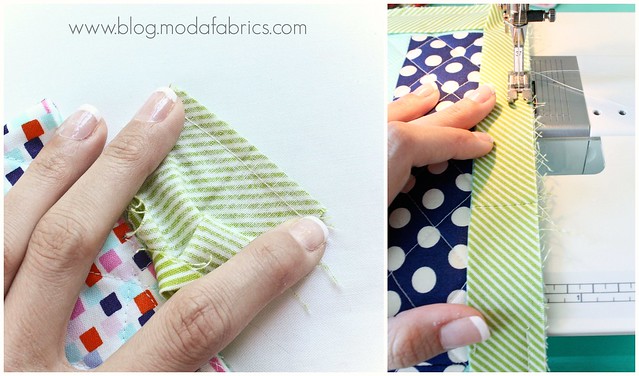
Trim the excess binding 1/4" from your seam (left). I like to open my seam, refold the binding in half and press it, but pressing is optional if you feel comfortable opening your seam and just refolding your binding without pressing. Just something I do for better accuracy. Line up the raw edge of your binding to your work and sew your gap closed, securing your stitches at both ends with backstitches. (right)
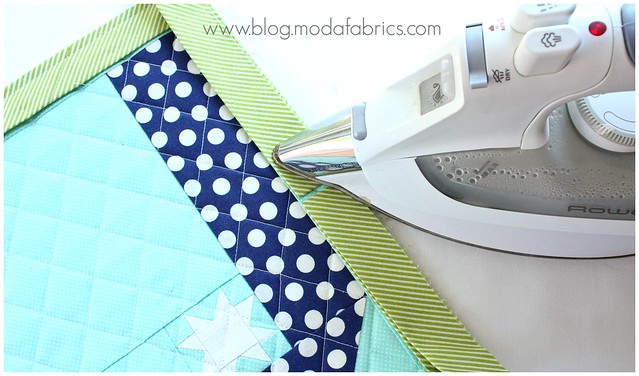
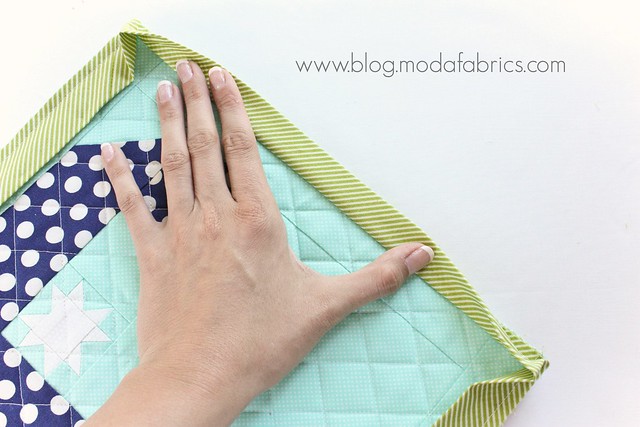
For small projects, particularly, I like to fold the binding over as you see below and press it down. It seems to help when I move on to the next step, pinning/clipping, and leaves a nice, straight, unstretched binding edge. You can probably do this to a large quilt too, but I've only ever done it on smaller projects like mini quilts or pillows.
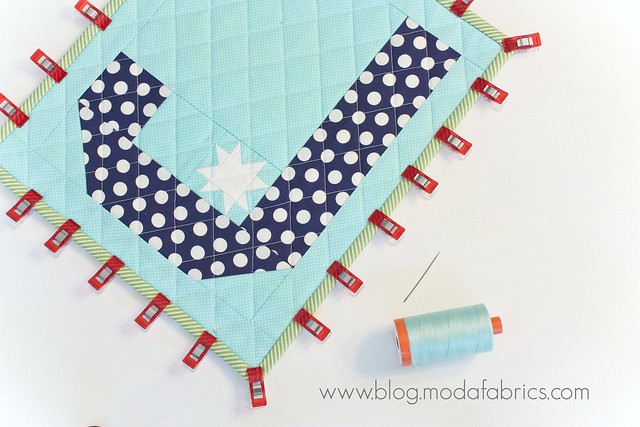
Next up, wrapping your binding. Wrap your binding from the front of your work, to the back and CLIP! If you haven't tried Clover Wonder Clips for binding, you MUST. They are game changers my friends! Trust me. Clip all the way along your edge, until you come to the corner. Creating a mitered corner on the back is very similar to the front, when we sewed it down. Fold your binding off the edge of the quilt, creating an angled fold (left). Fold the corner in, matching that angled fold to the center of your corner (middle). CLIP! Clip right over that mitered fold (right). Folding the corners is my favorite part! :)
Clip as frequently or infrequently as you feel comfortable. Clip your entire quilt or clip 10 at a time. I personally like to do a few at a time, 5-10, and re-clip as I need to.
Now your binding is ON and you can hand stitch or machine stitch as you prefer. Speaking of which, I will be working on a couple tutorials for both of those. Finishing your binding with hand stitching and machine stitching, so stay tuned.
I really hope this tutorial is helpful for those of you looking for binding tips. If you have ANY questions, please let me know. Leave a comment, visit my blog or Instagram or contact me via email. Now hurry up and get those WIP's bound!!
XOXO Jessie
Comments